How to Dynamically Populate Data from Gravity Forms to another Gravity Form and Sign a Document
kevin.gray
What if you could pass data from one Gravity Form to another NEW Gravity Form and then send/trigger a custom contract using data from BOTH Gravity Forms?
With Easy Passthrough for Gravity Forms an incredibly affordable (currently $59) you can now populate a second Gravity Form’s fields with user entry data from a previously submitted form and using our Gravity Form WP E-Signature Add-On integration you can trigger a WP E-Signature generated contract with data from that second contract. You have the option of redirecting a user immediately after the Gravity Form submission or emailing a custom signer invite email to the email used in the form.
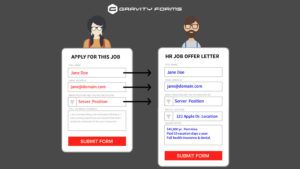
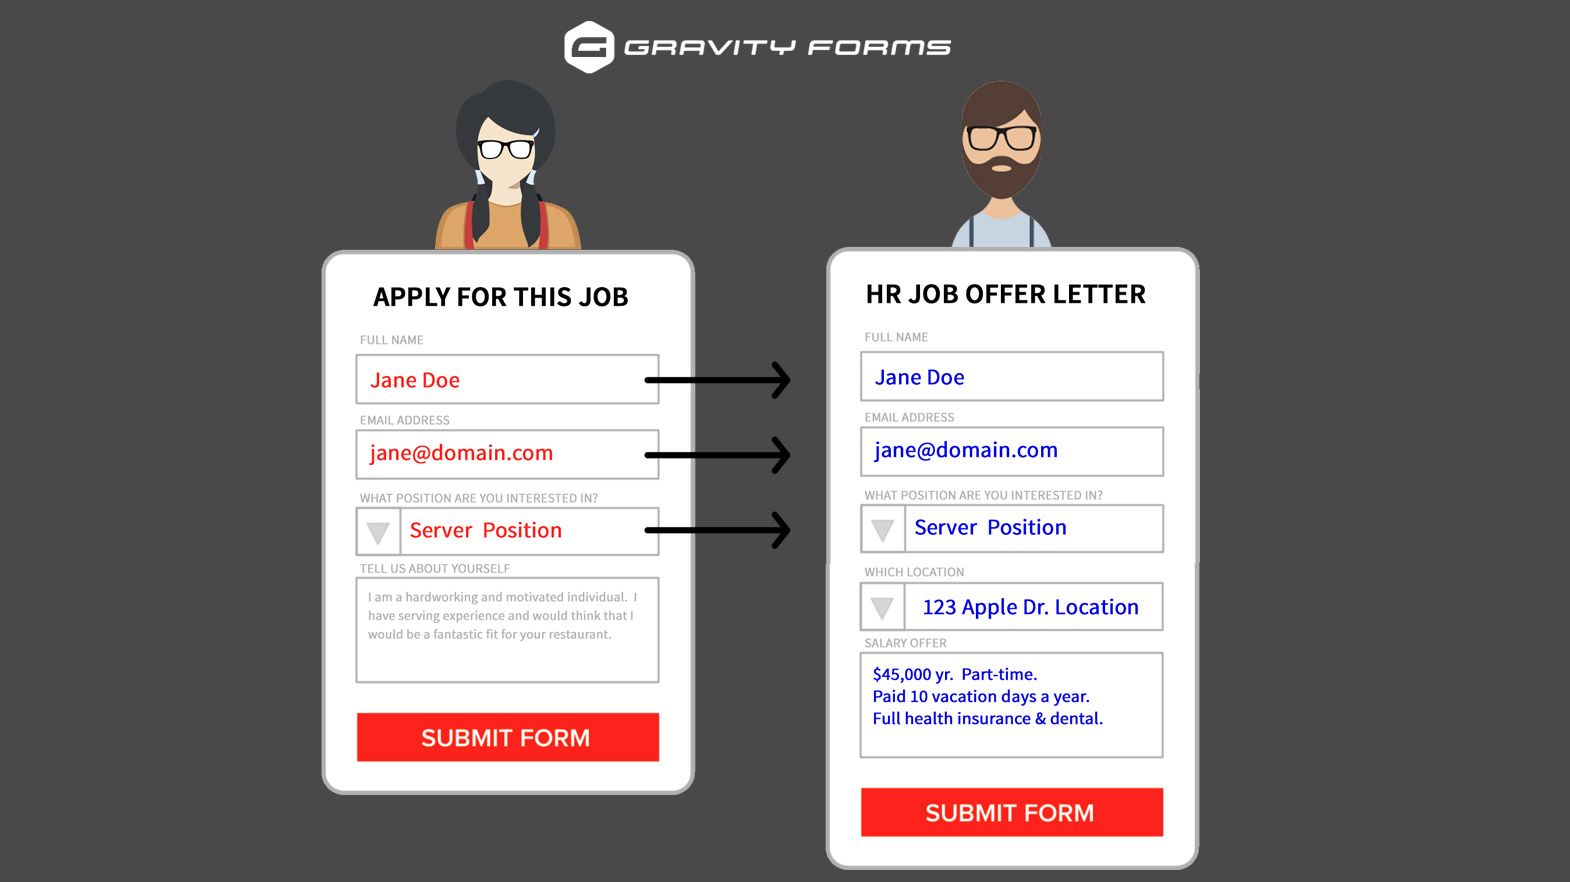
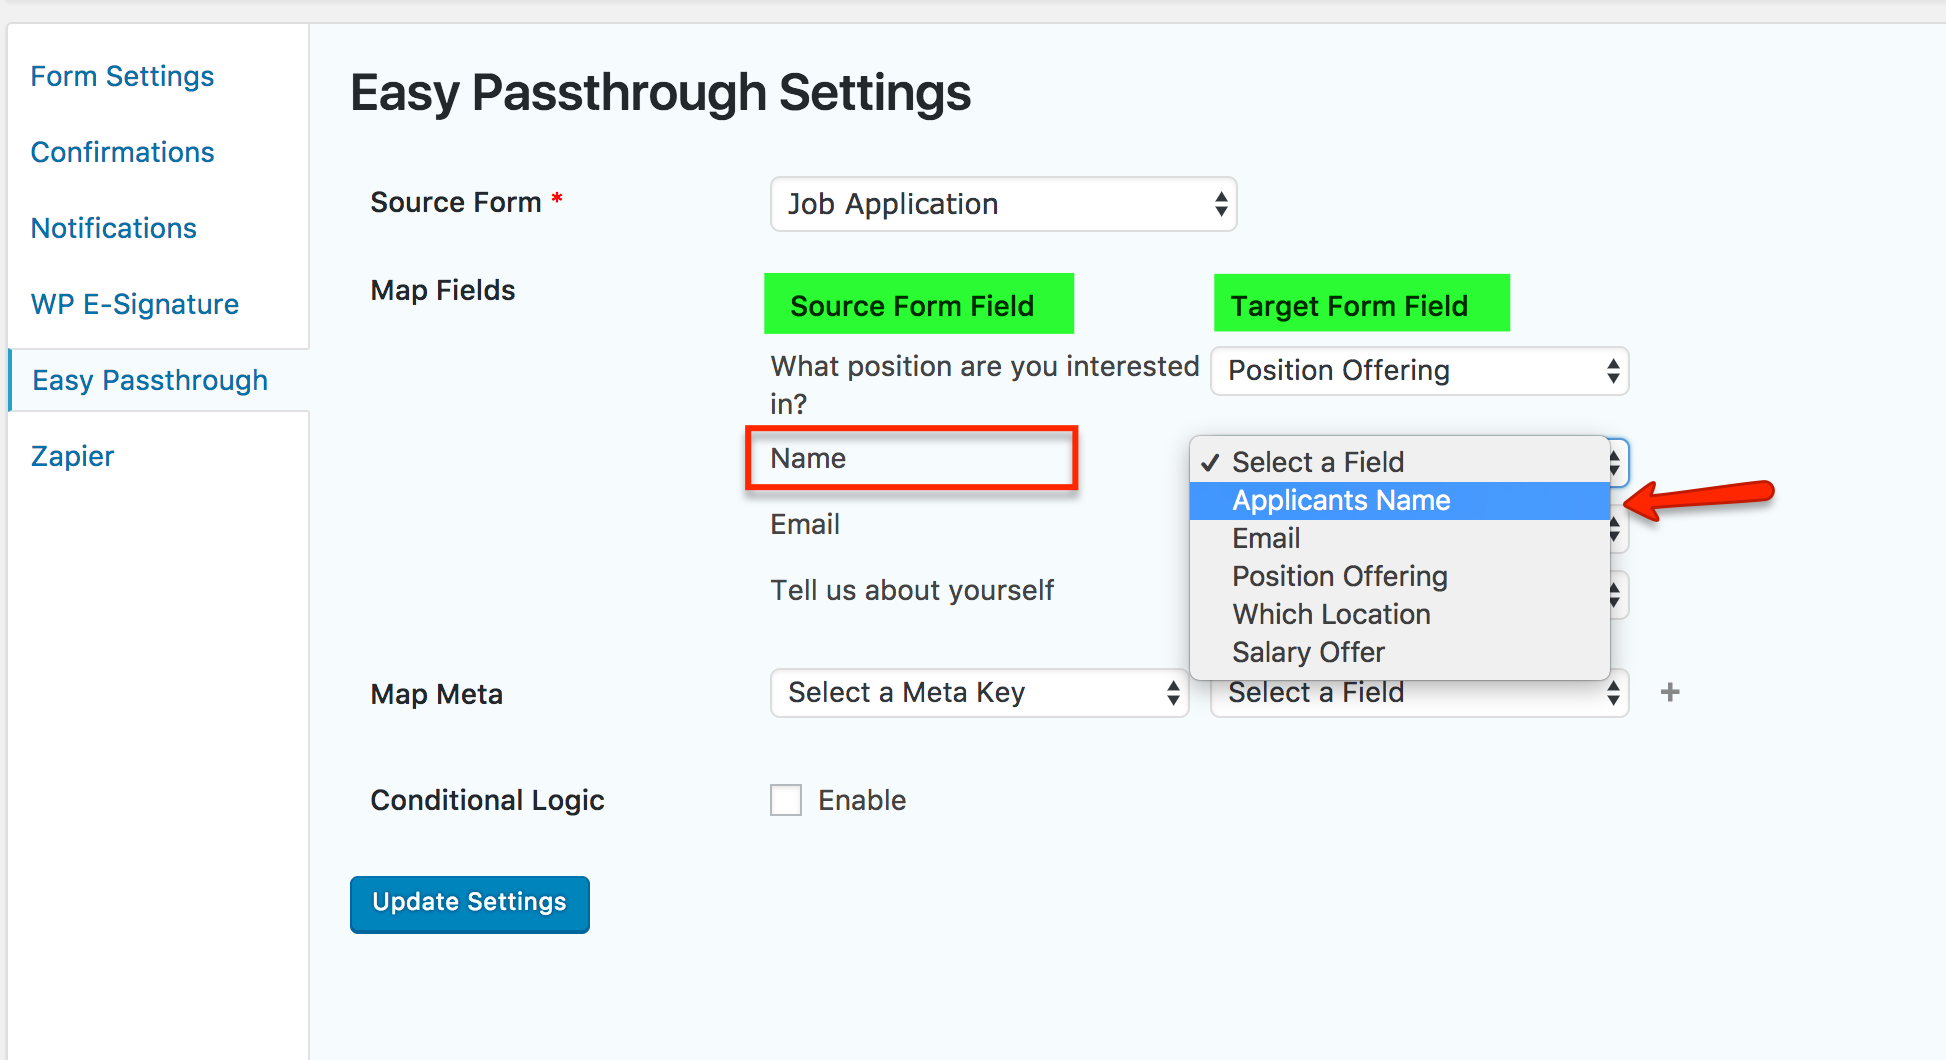
Here is a screenshot of how the passthrough population works.
Plugins/Add-Ons needed for this workflow:
1. Install Gravity Forms
2. Install the Easy Passthrough Add-on ($29)
3. Install WP E-Signature by ApproveMe
4. Install the WP E-Signature -> Gravity Forms integration
How to Setup this Workflow:
1. Create your Form #1 in Gravity Forms

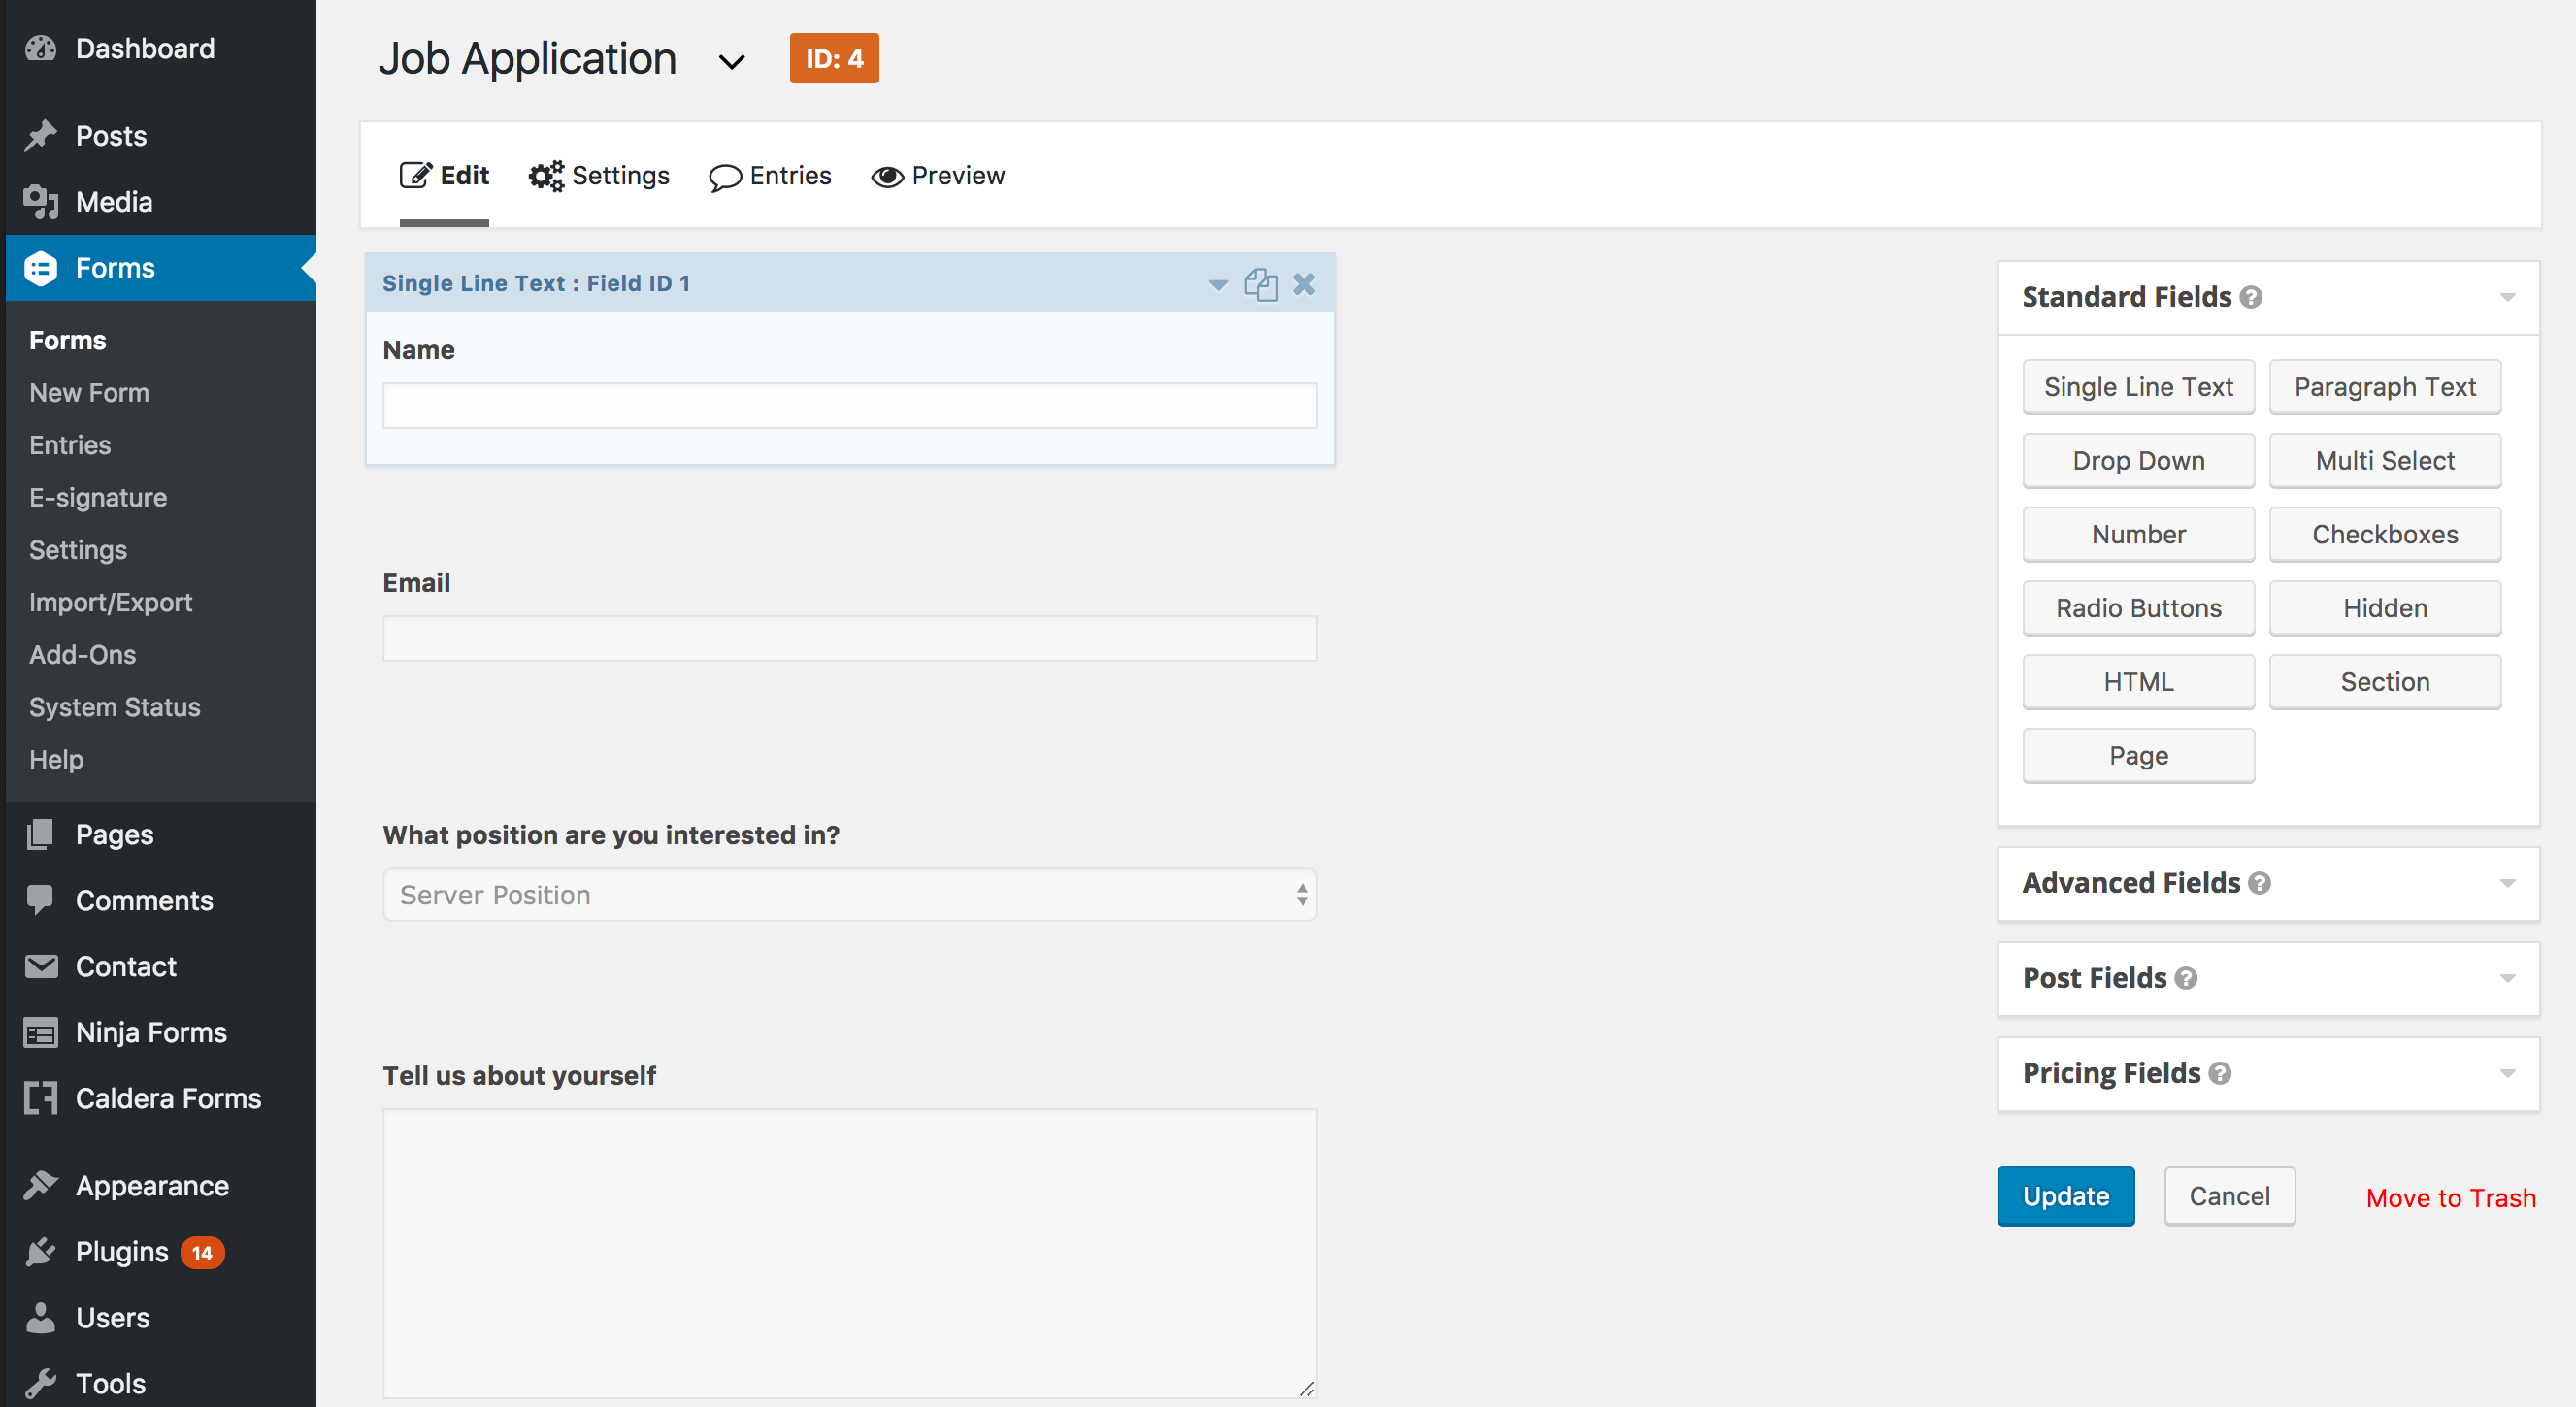
2. Create your Form #2 in Gravity Forms

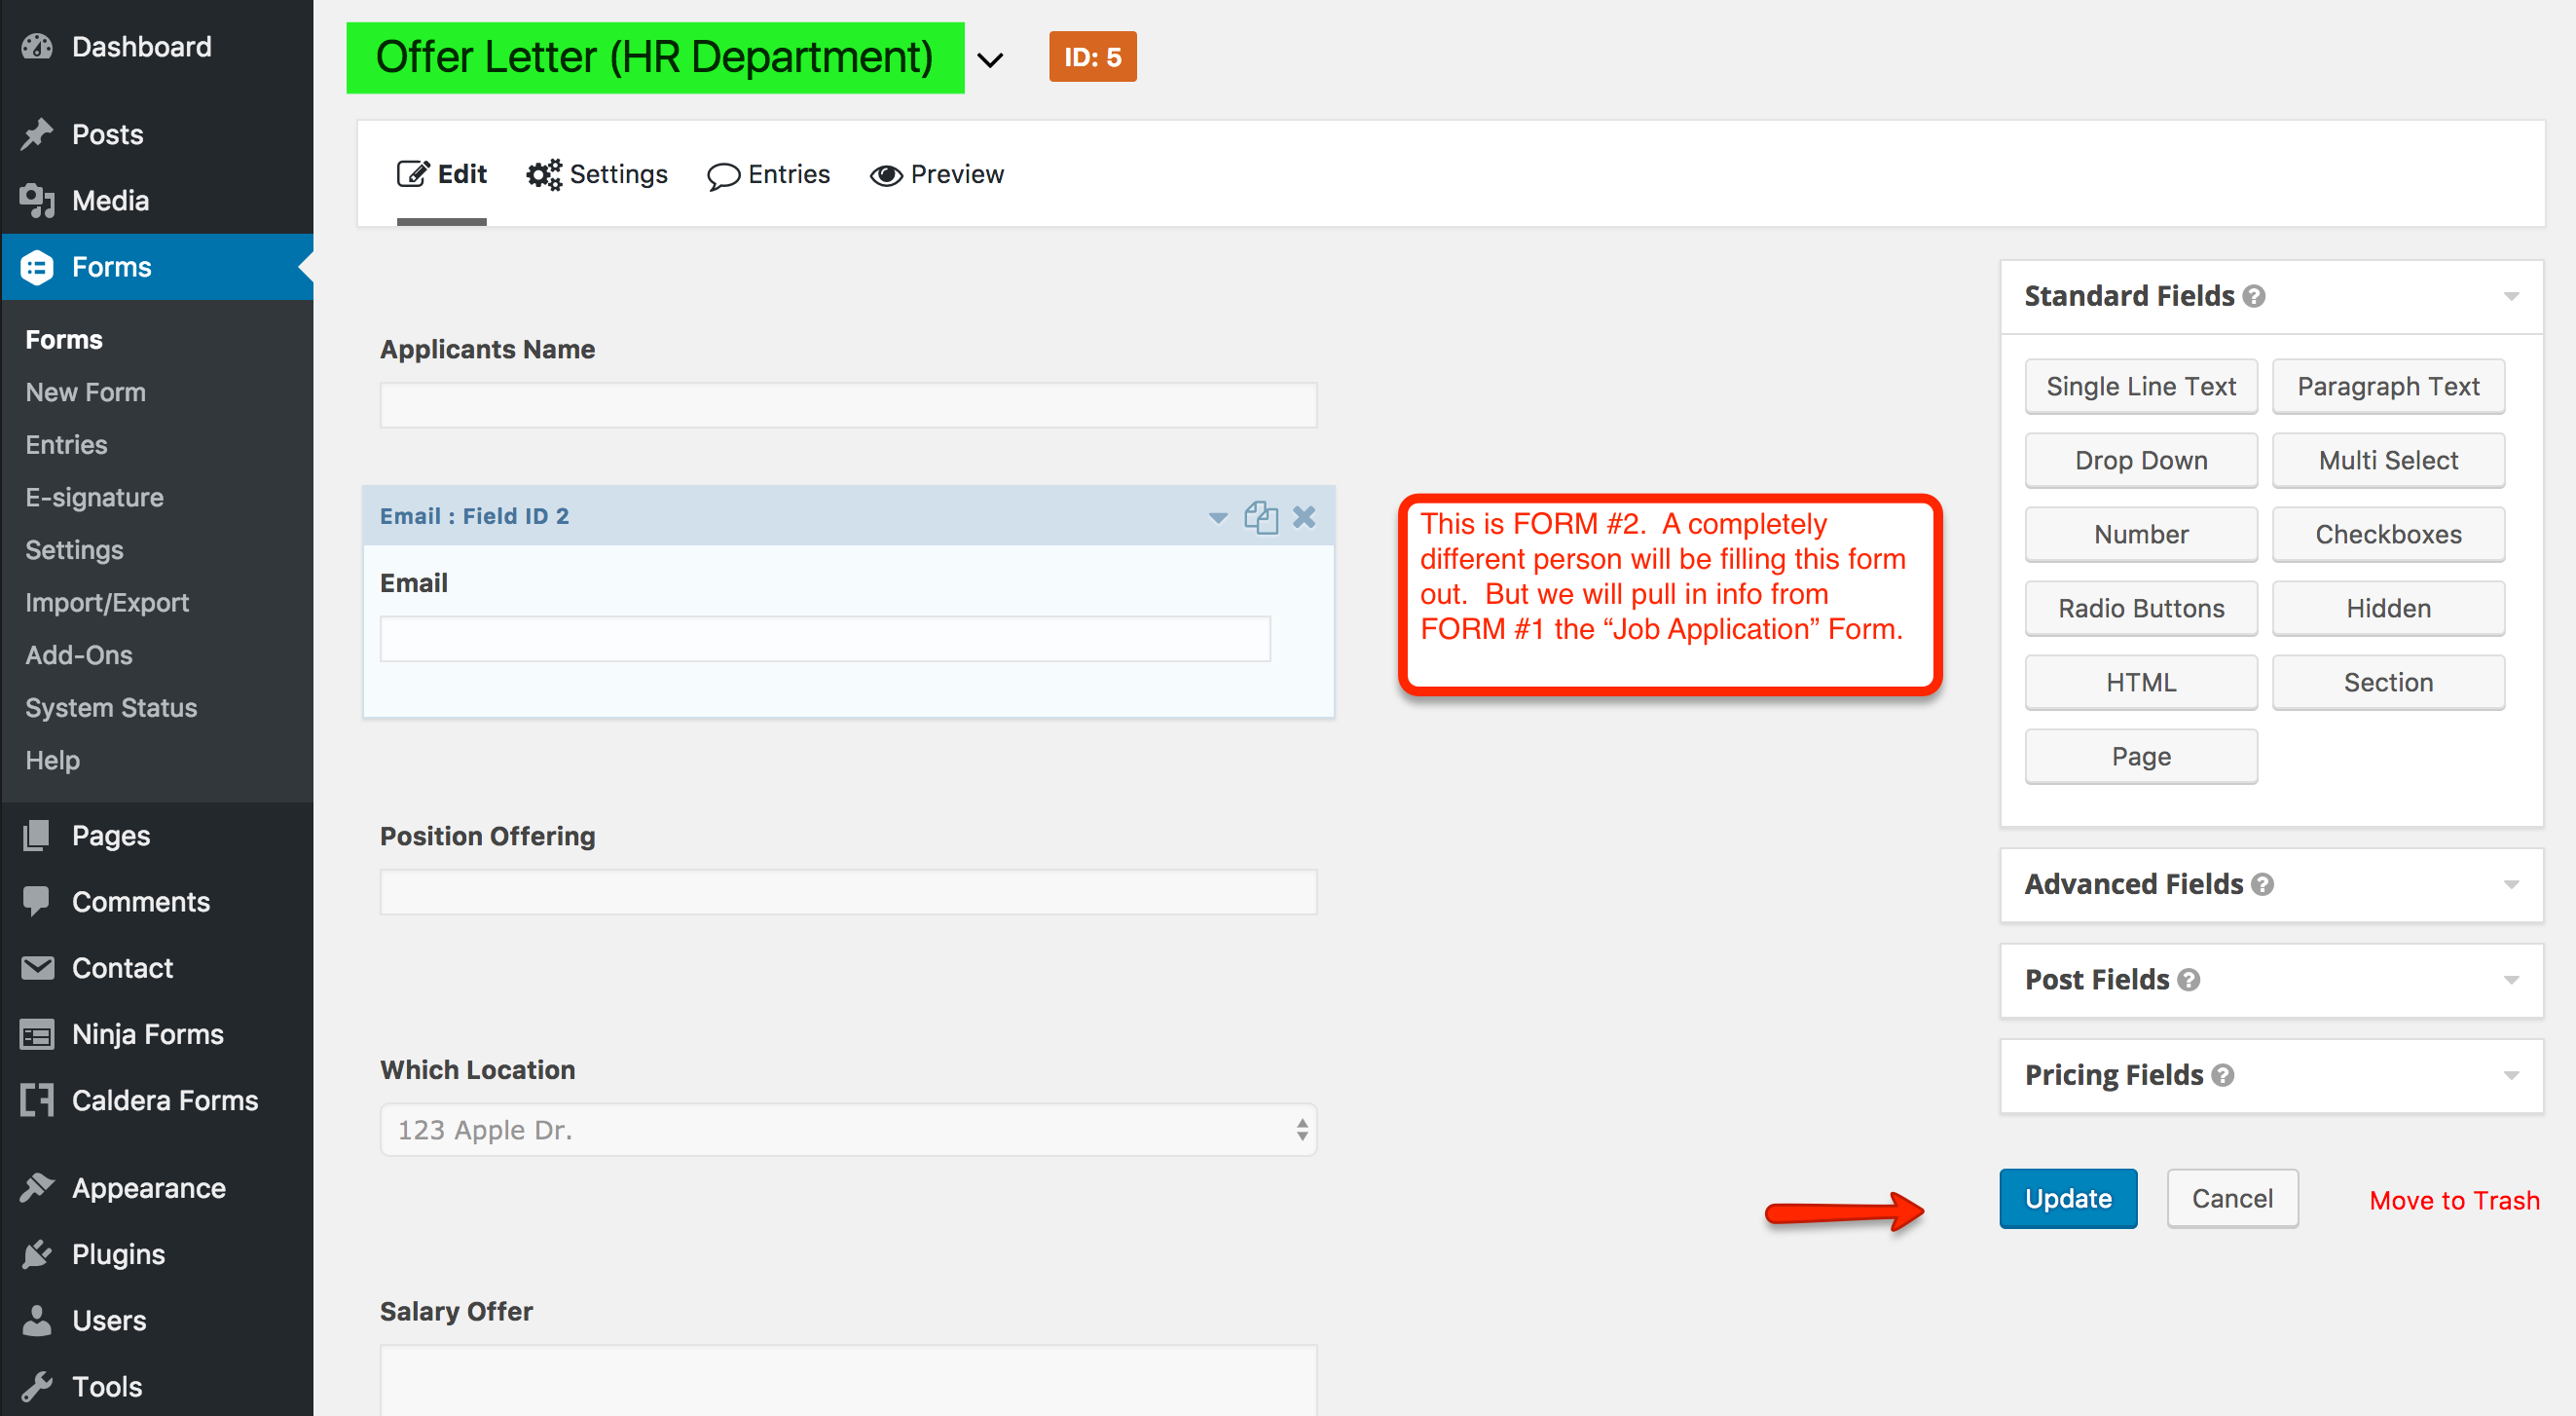
3. Go to the “Easy Passthrough” tab
Go to the “Easy Passthrough” tab on the second form that will be receiving the data from the first form.
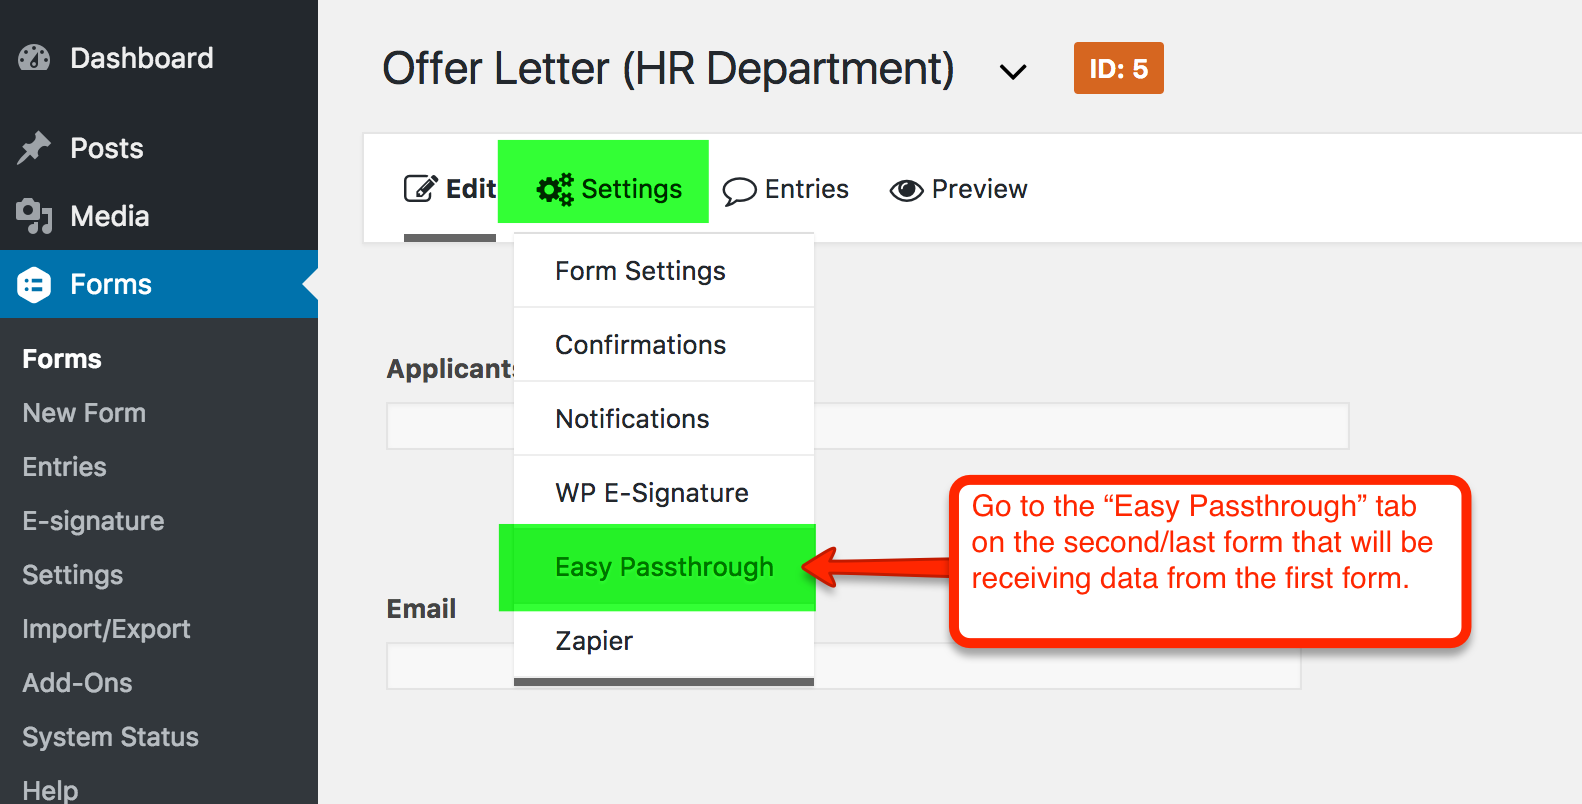
4. “Add New” workflow for “Easy Passthrough”
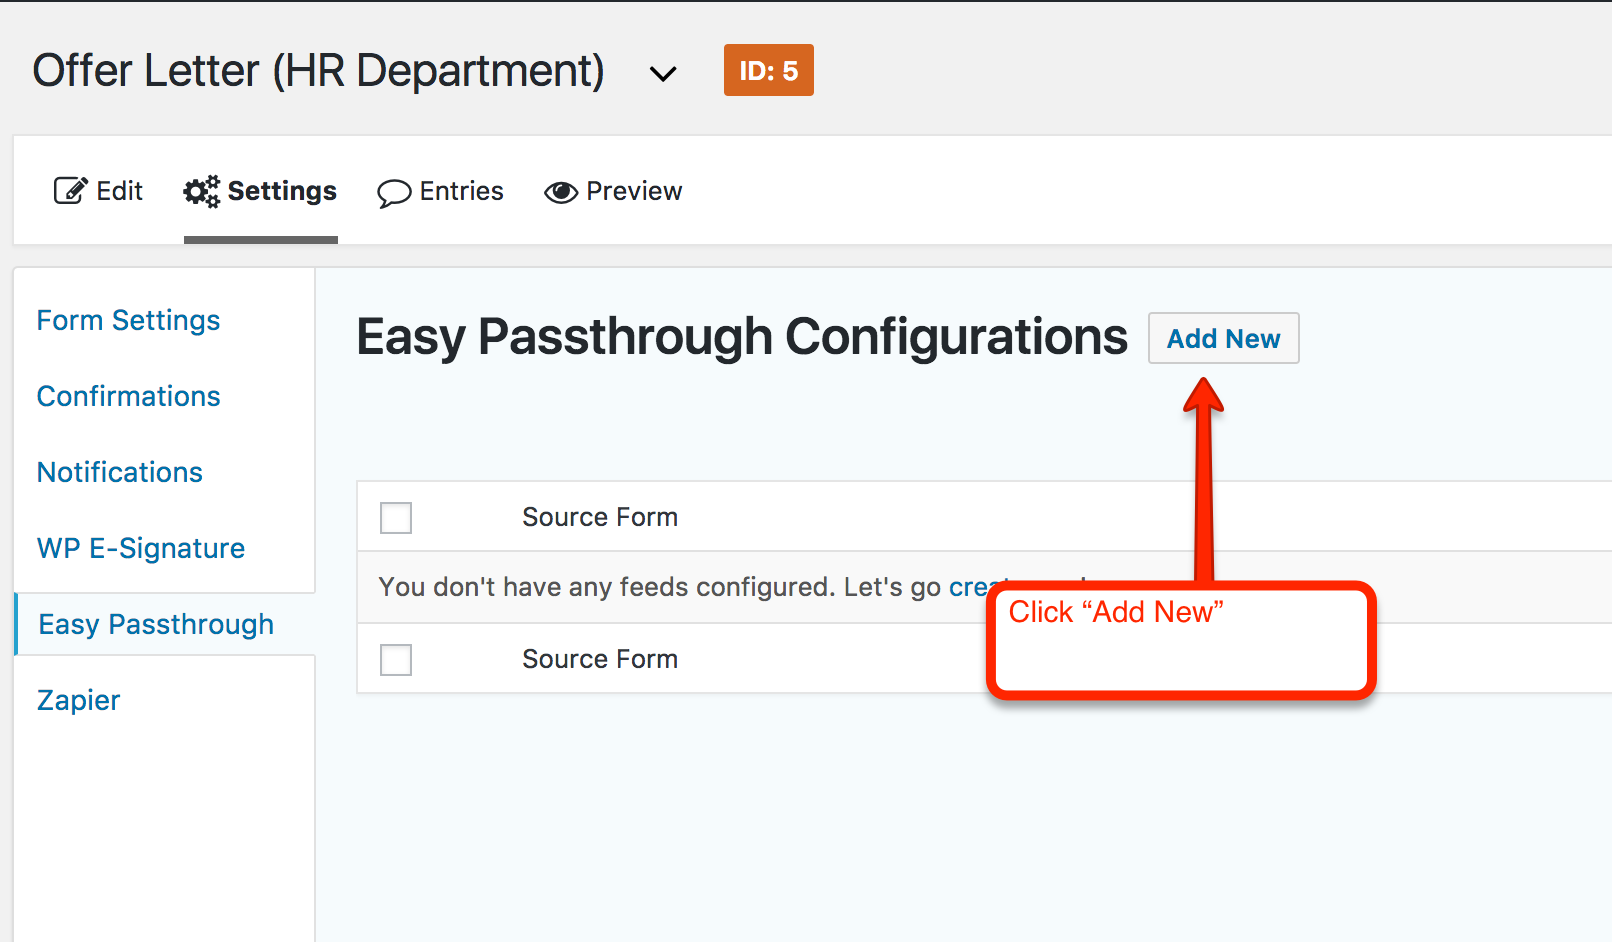
5. Select Your Passthrough Form
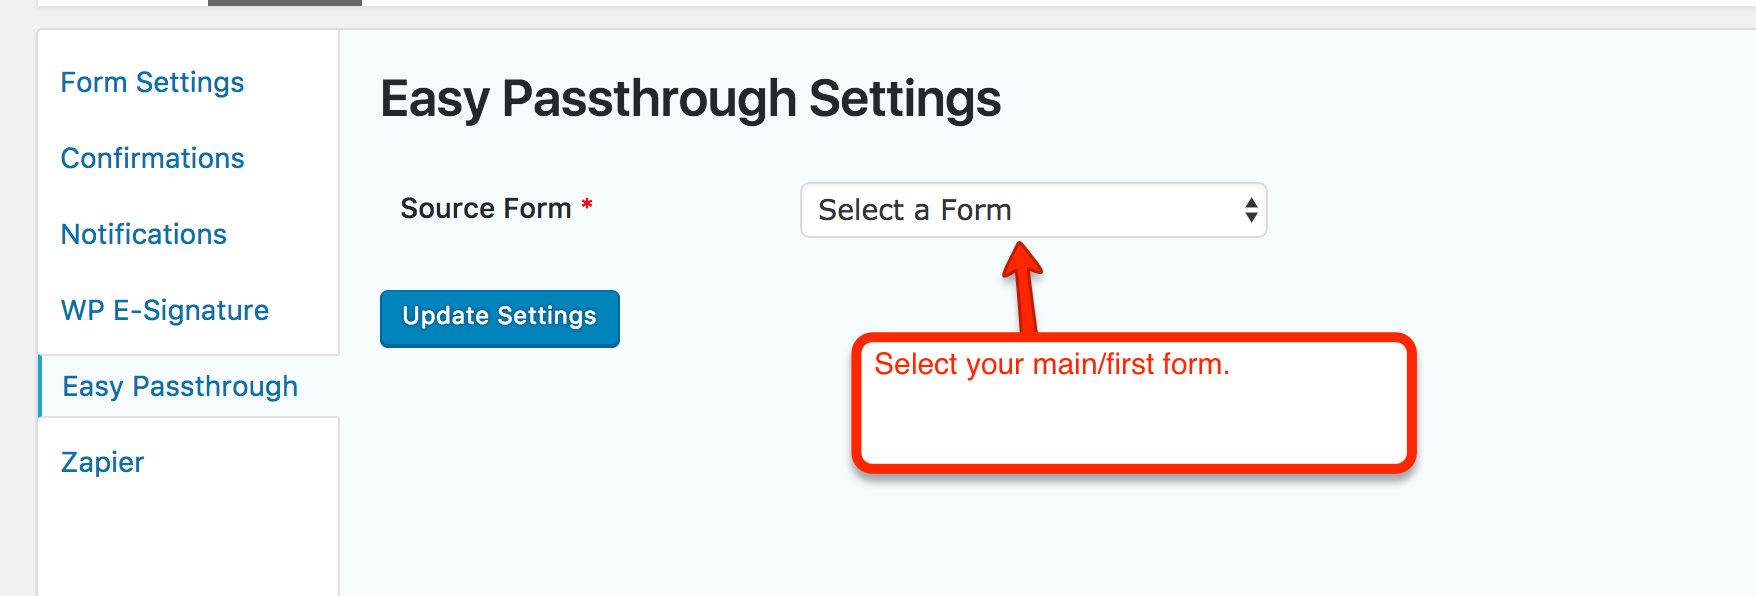
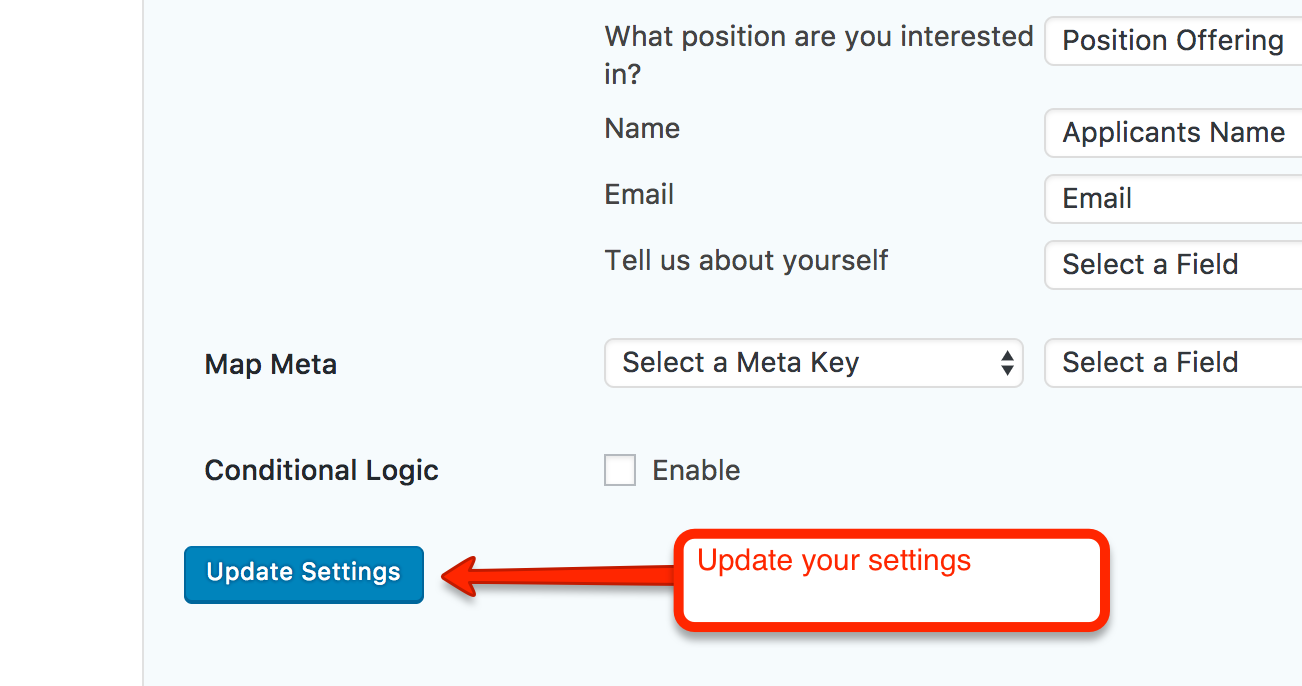
6. Define the Source Form and Target Field Data You Want Pre-Filled
7. Add the Forms to WordPress Pages
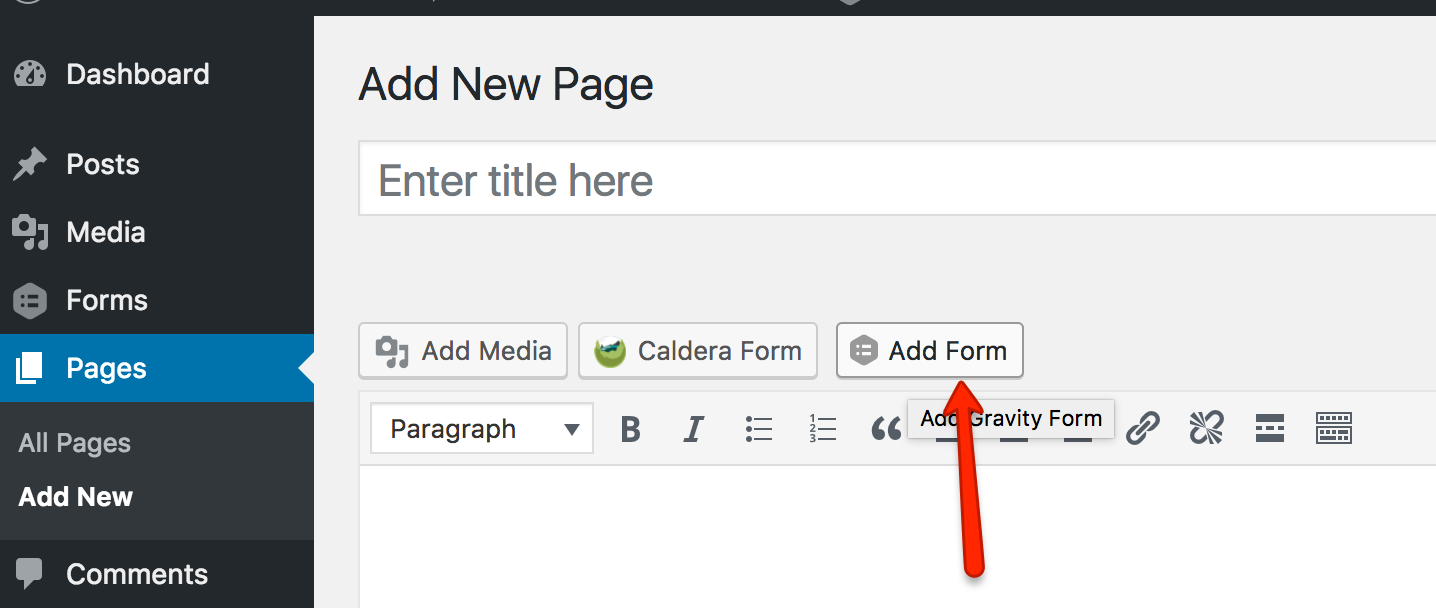
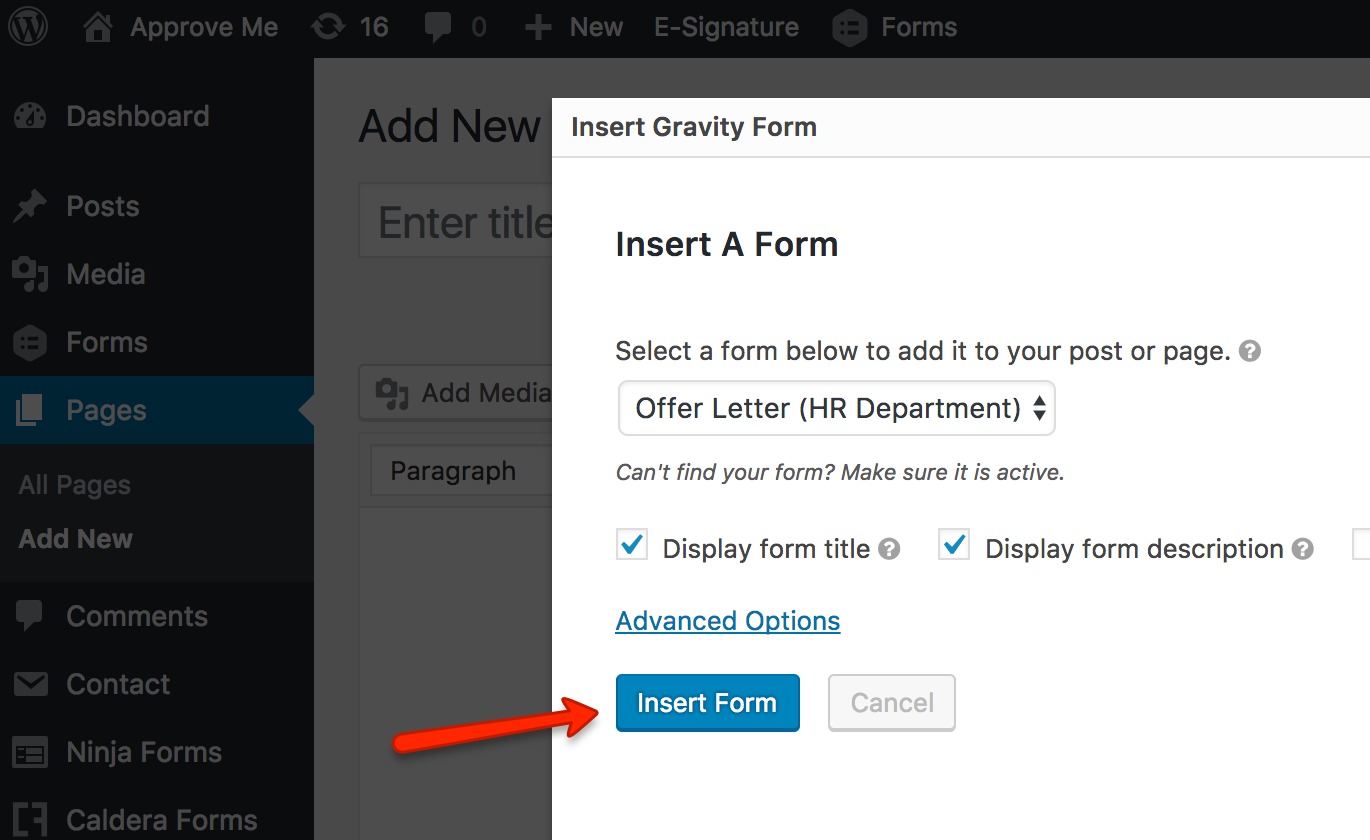
– Add Page + Select Gravity Form + Insert Form + Save Page
In this example:
• Form 1 (Job Application) will live on www.yoursite.com/apply
• Form 2 (HR Offer Letter) will live on a password protected www.approveme.com/offer-letter
8. Create the custom URL that User #2 will need to Access the Pre-Filled Form
Easy Passthrough allows for entry data to be transferred across multiple sessions using the special Easy Passthrough token. This token is a secret key, unique to each entry, preventing random users from guessing at the token and passing through entries they should not have access to.
Easy Passthrough token links can be added to both form confirmations and notifications.
Adding an Easy Passthrough Token
Go to the Confirmation or Notification you want to add the token to.
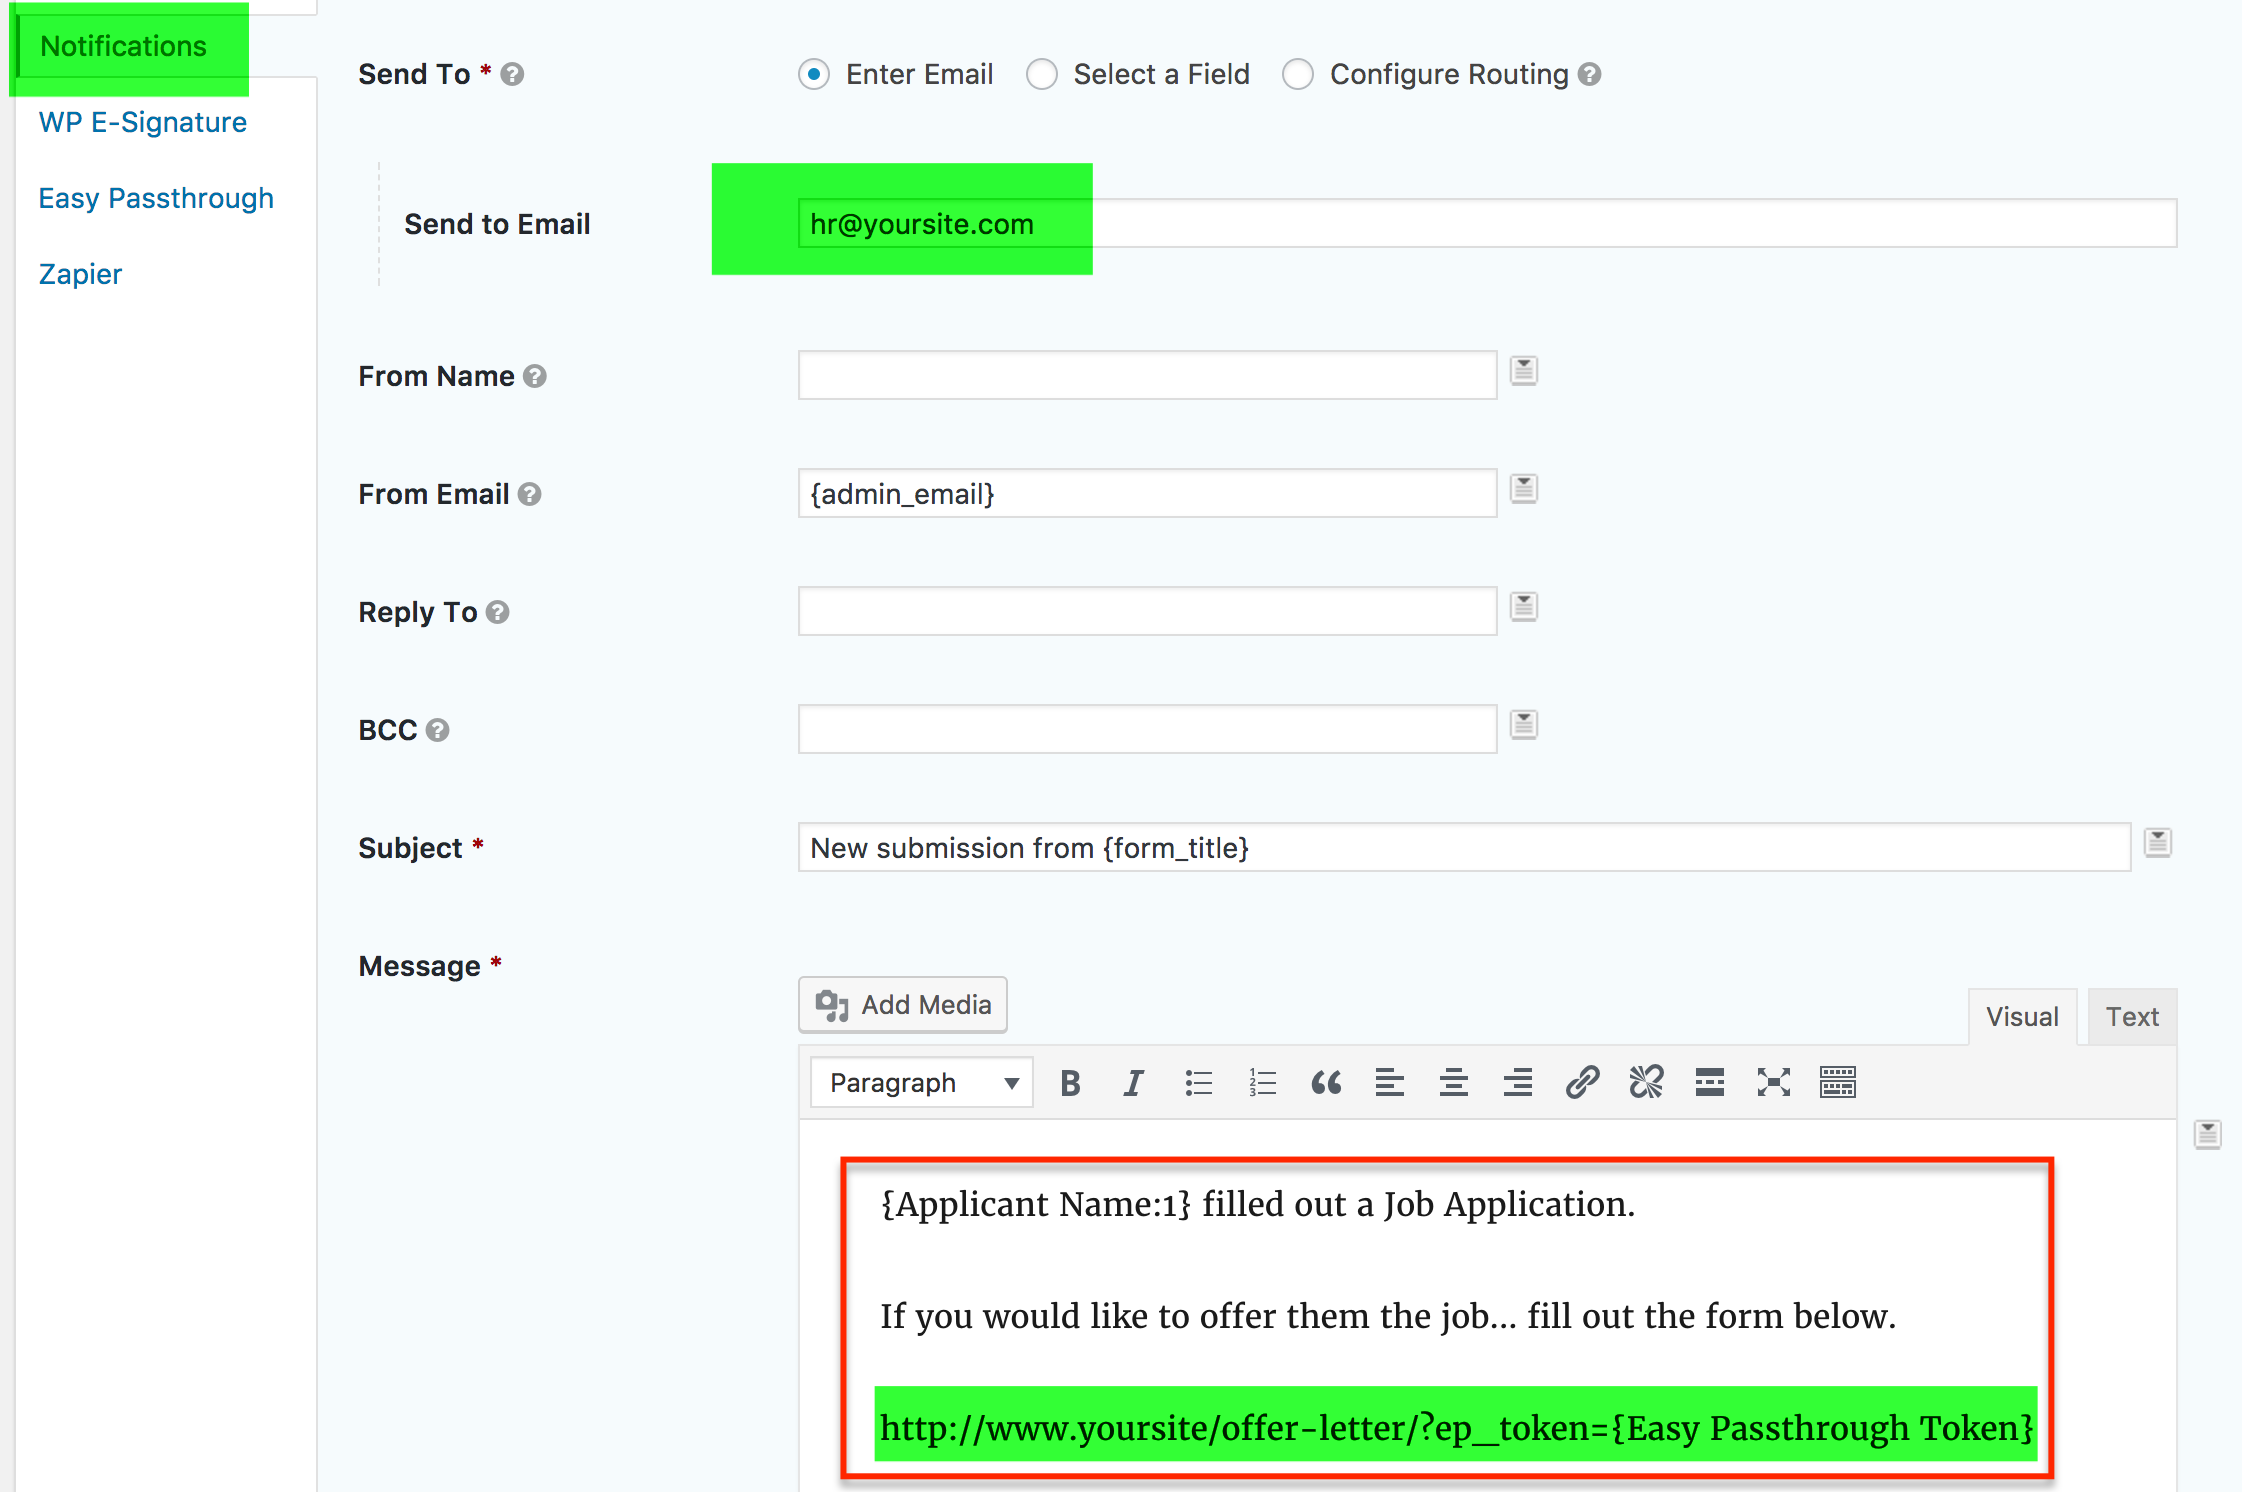
Add the ep_token={Easy Passthrough Token} query parameter to your link.
For example, if the form you’re trying to populate ( i.e. Form #2 -> HR Offer Letter) live on a password protected page at https://www.yoursite.com/offer-letter/, you will need in Form #1 to send a notification (or setup a more advanced integration with Zapier to Google Sheets) with the query parameter https://www.yoursite.com/offer-letter/?ep_token={Easy Passthrough Token}. The {Easy Passthrough Token} merge tag will automatically be replaced with the token unique to that entry.
This is where the “magic” happens and WHY you are able to access the data later.
When the user visits that link, the entry will be added to their current session and usable by any forms that use that entry’s source form.
* Go to FORM #1 -> Notifications and setup something like this:
9. Setup Gravity Form #2 to WP E-Signature Integration
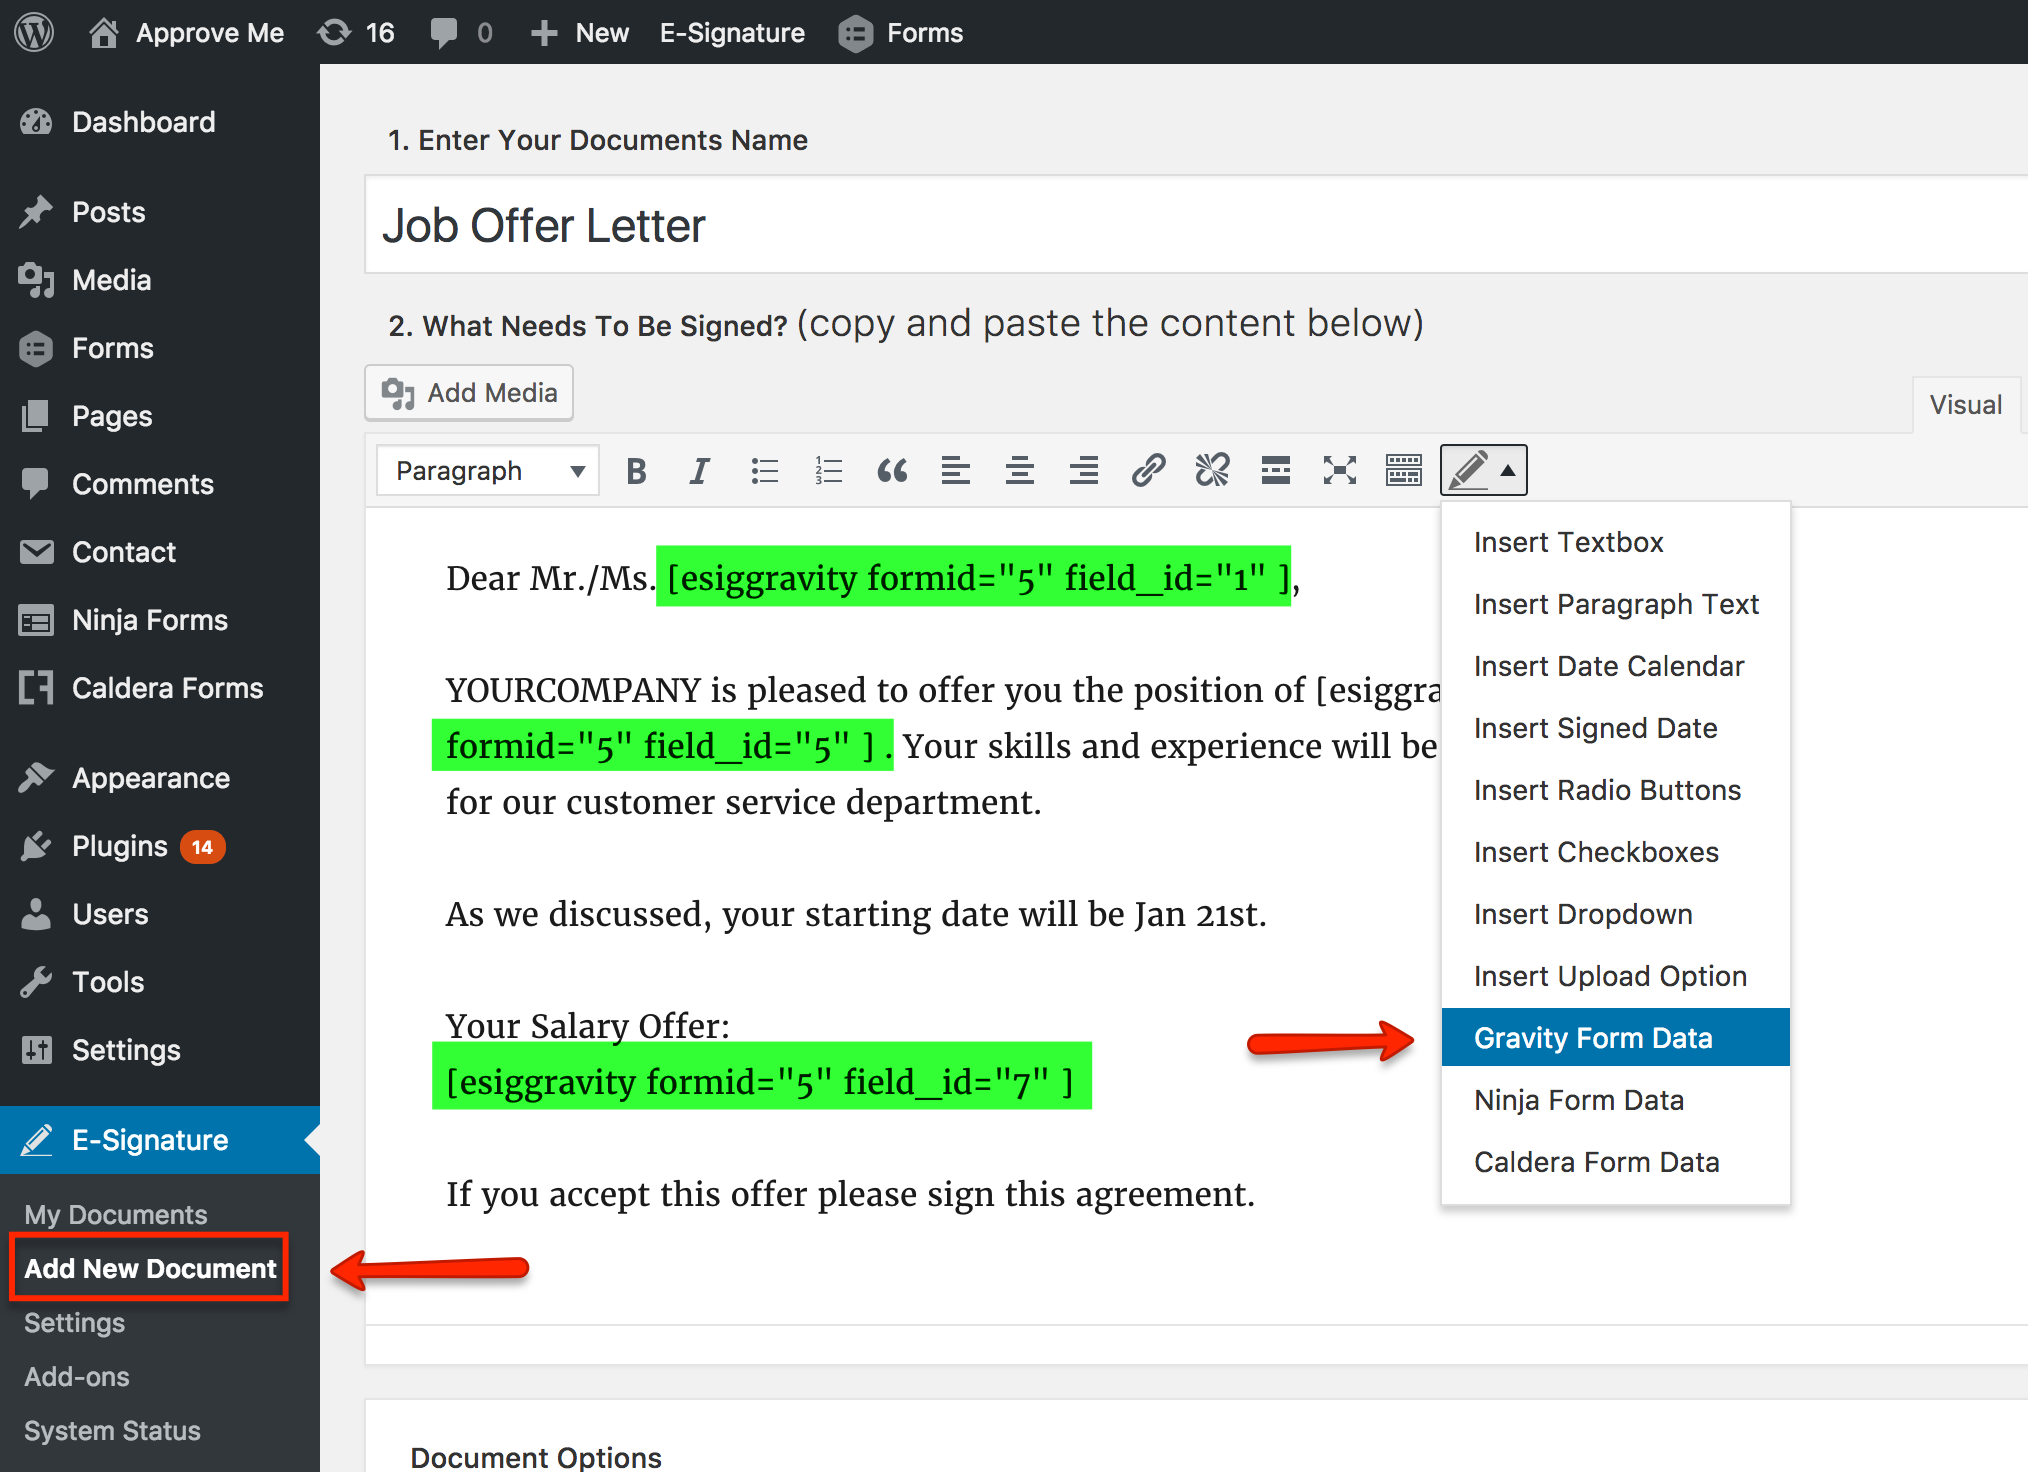
Go create your your Job Letter that is going to be generated from dyanmic field data from the Form #2 fields. ONLY populate the contract with Form #2 fields.
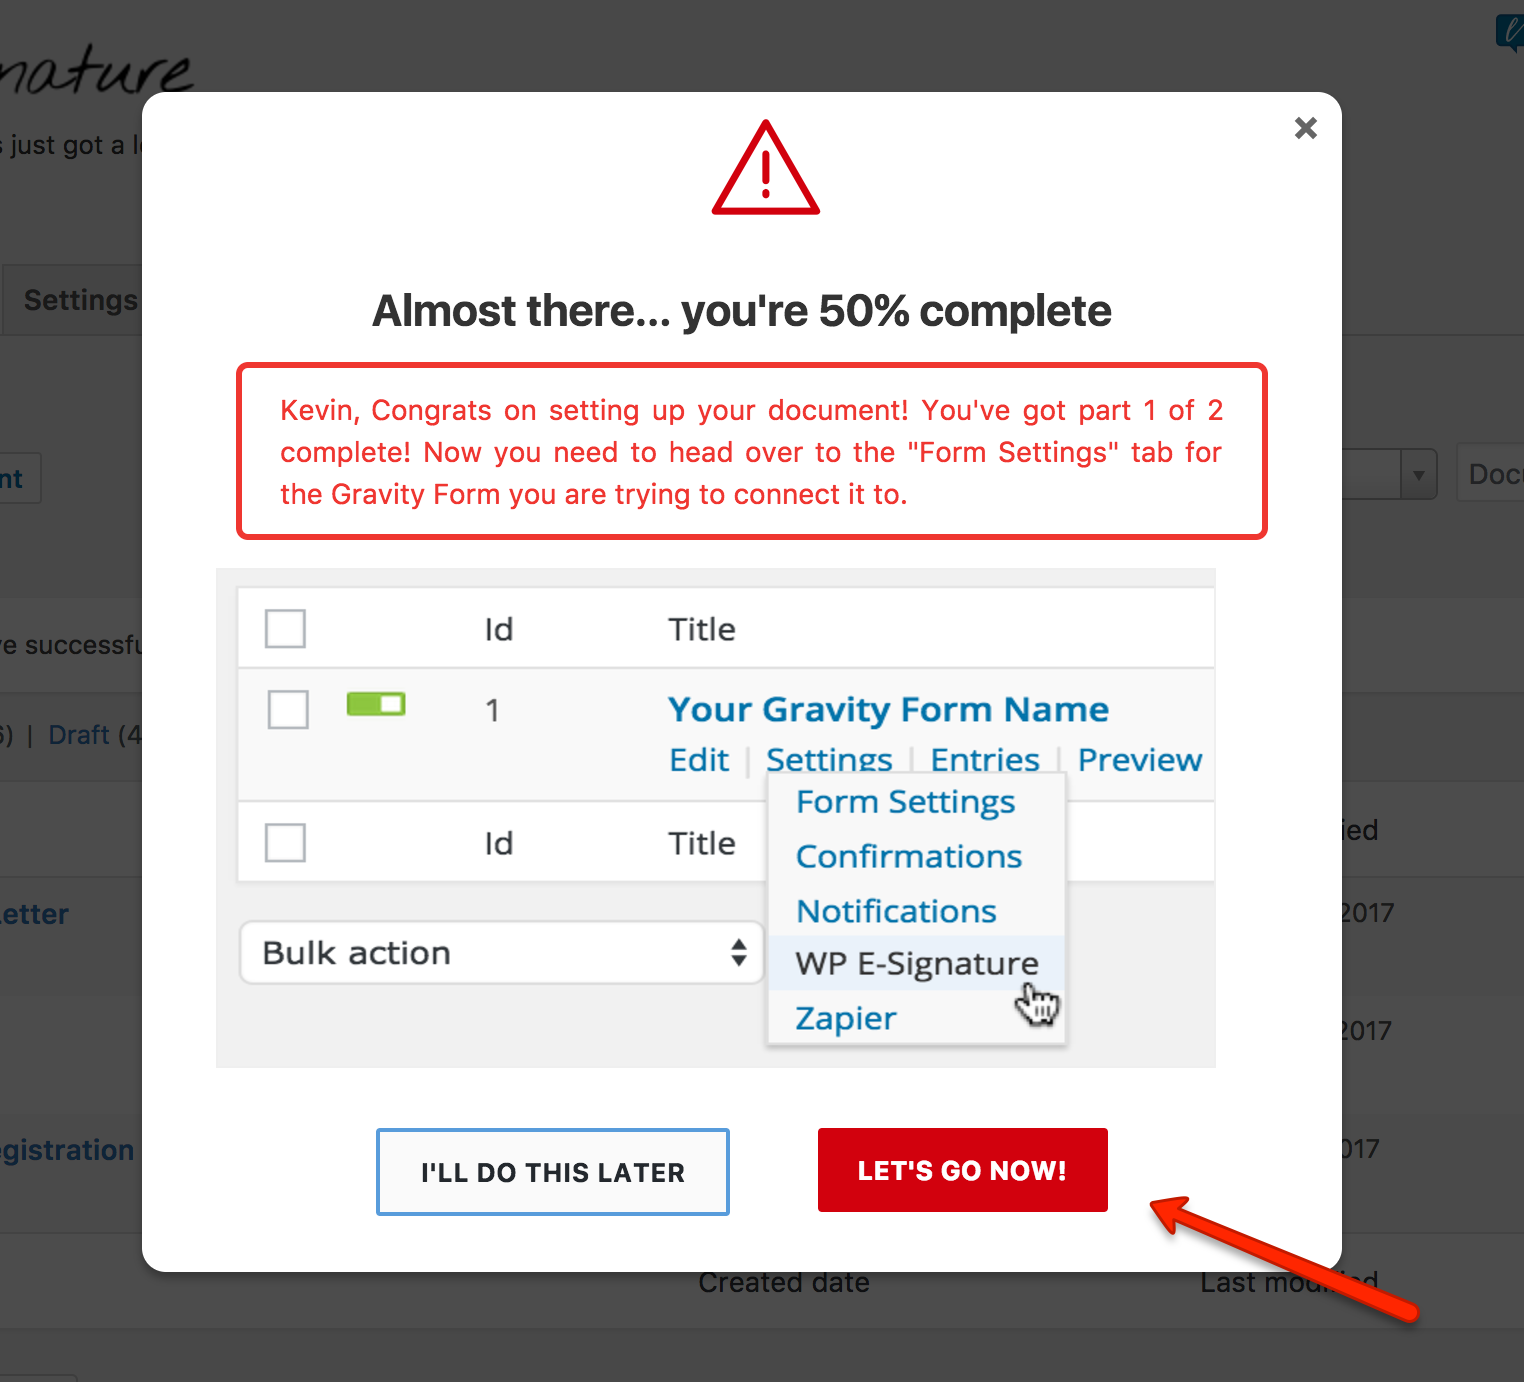
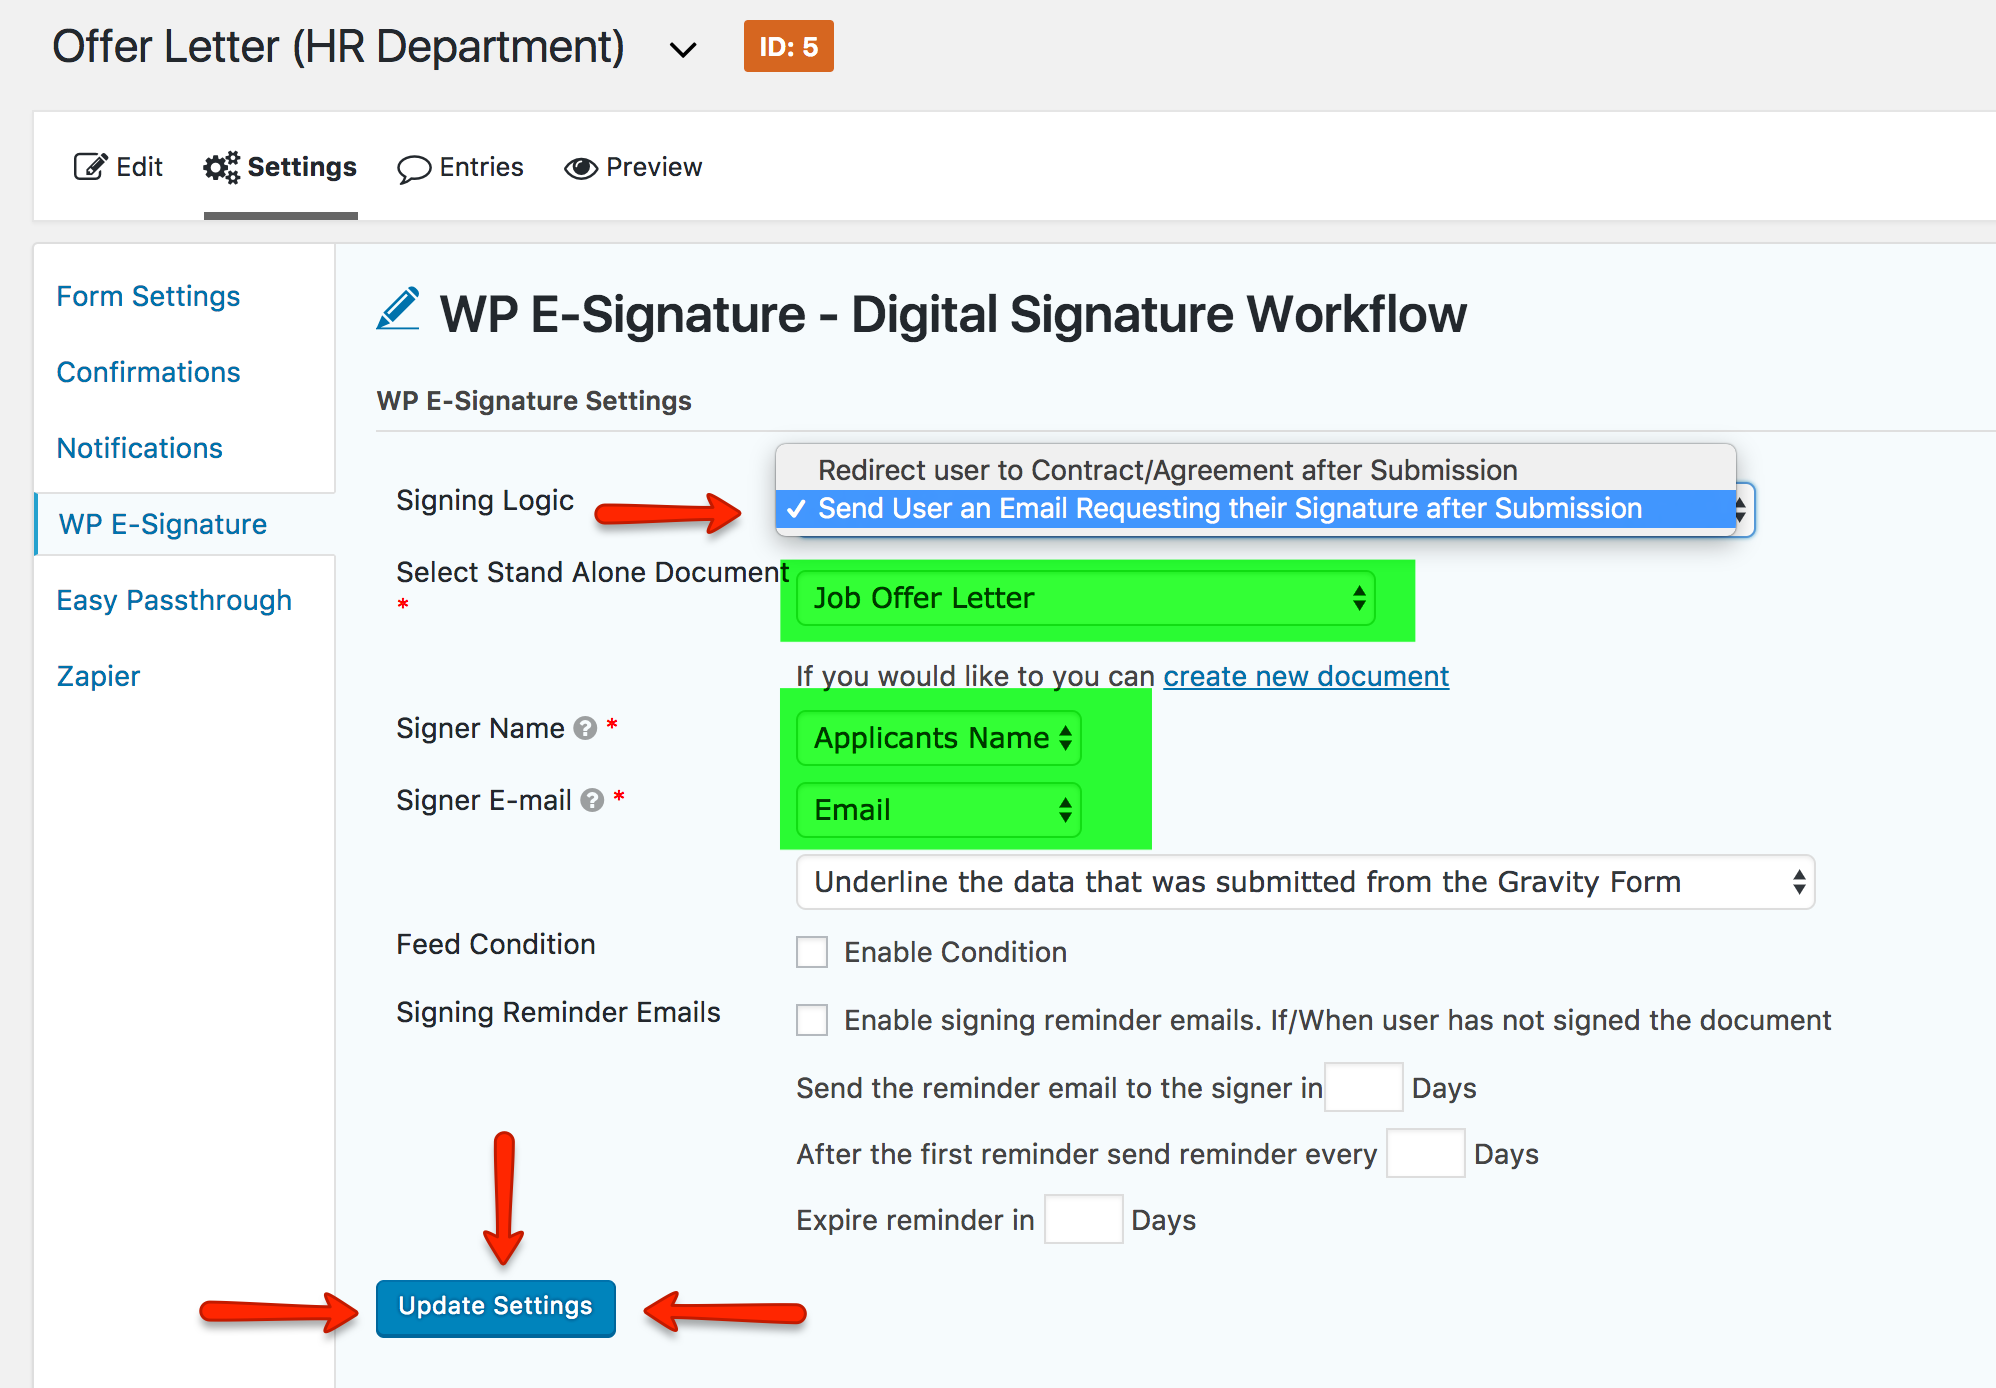
Click LETS GO NOW and head over to the E-Signature Workflow inside of the Gravity Form (Form #2).
10. Now you’re good to go!
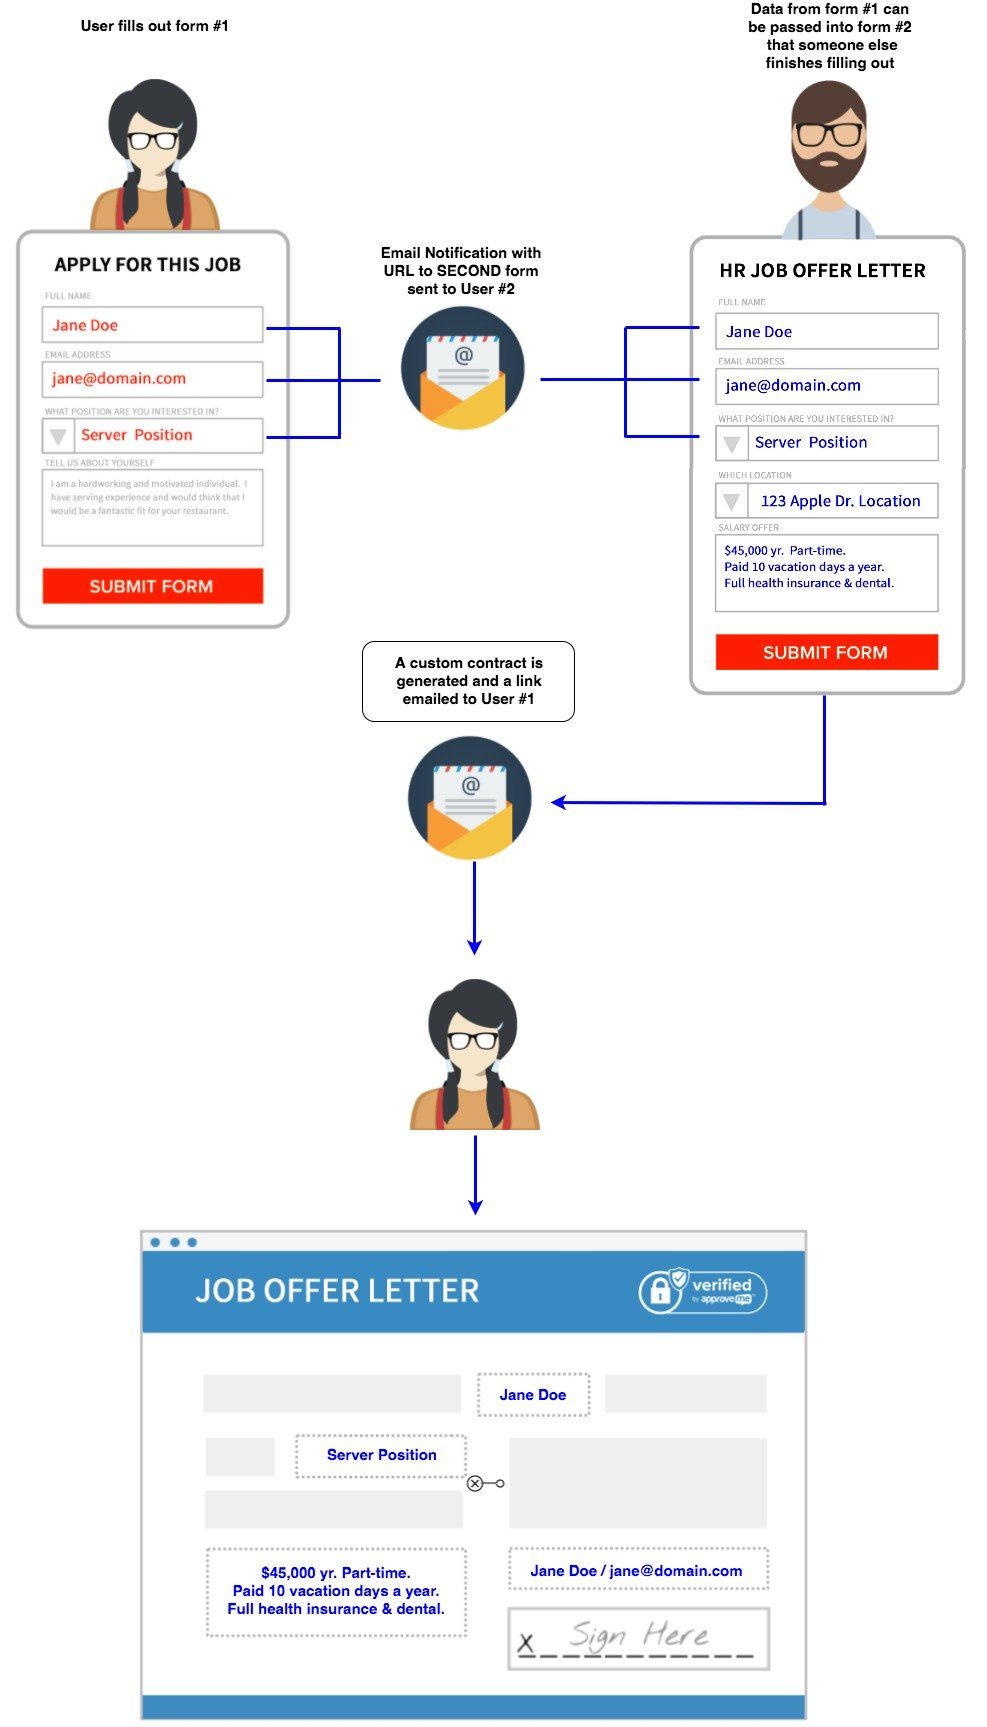
Here’s what happens…
1. User Submits Form #1 Job Application
2. An email notification gets emailed to the HR department with a special link to a partially pre-filled Offer Letter Gravity Form (so they can choose if/when and to whom to send an offer letter)
3. HR Department clicks the link and loads Form #2 (Offer Letter Form)
4. Offer Letter Form #2 is pre-populated with the relevant fields from User from Form #1
5. HR Completes the Form and clicks “SUBMIT”
6. A WP E-Signature “Offer Letter” Contract gets generated behind the scenes and pre-populates the fields from Form #2 in their proper places… an email invitation to sign this Offer Letter is emailed to the email address that was setup. In this case it is sent to the email address that User 1 from Form #1 entered in the Job Application form.

