
Zapier is a powerful application that acts as a phone switchboard between two more more applications. Occasionally your esignature workflow might require an advanced integration with a third-party service, google spreadsheet, zoho mail crm, etc. In this case you can setup an advanced E-Signature to Zapier workflow using the Zapier Email Parsing feature and the Signer Notification emails that get sent out once a document has been signed. Here are the steps outlined below.
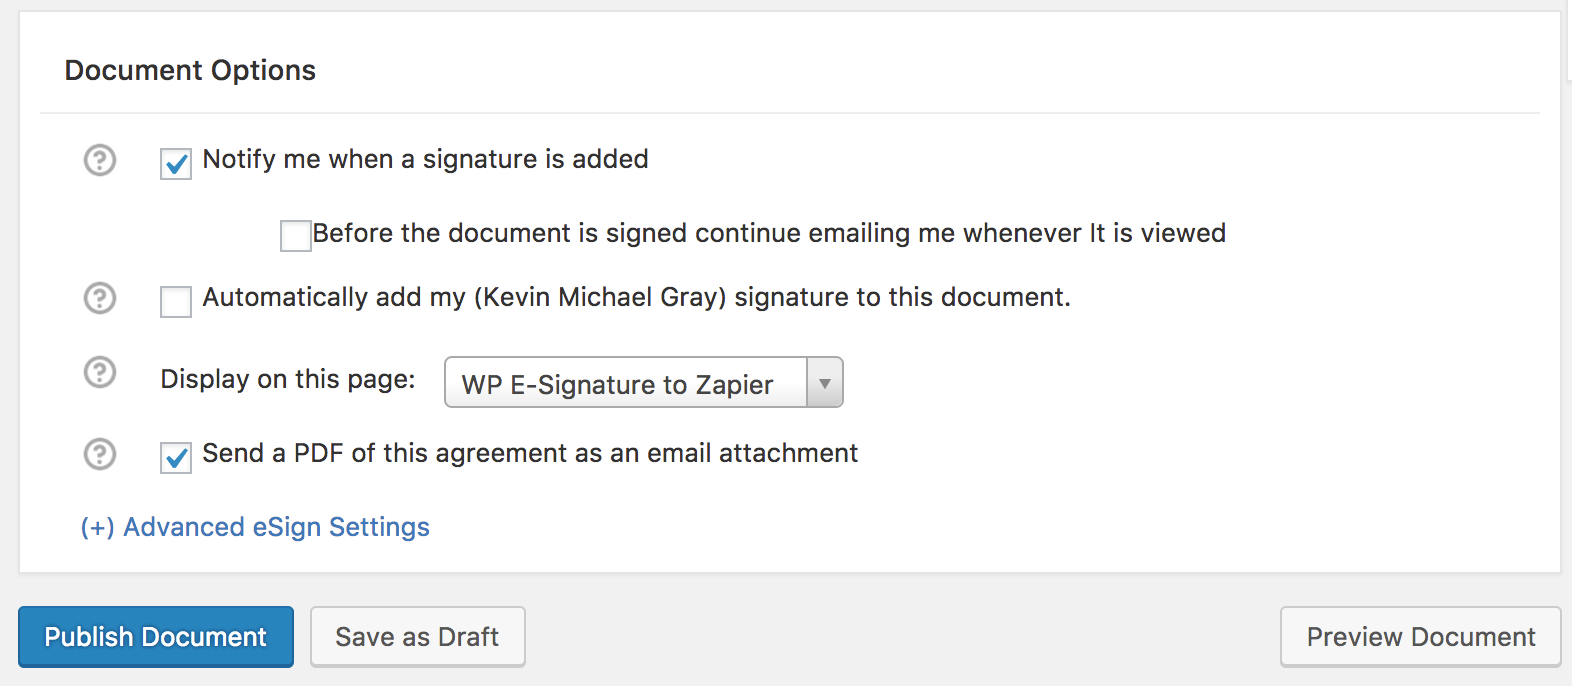
After you have created a new document (likely a Stand Alone Document)….
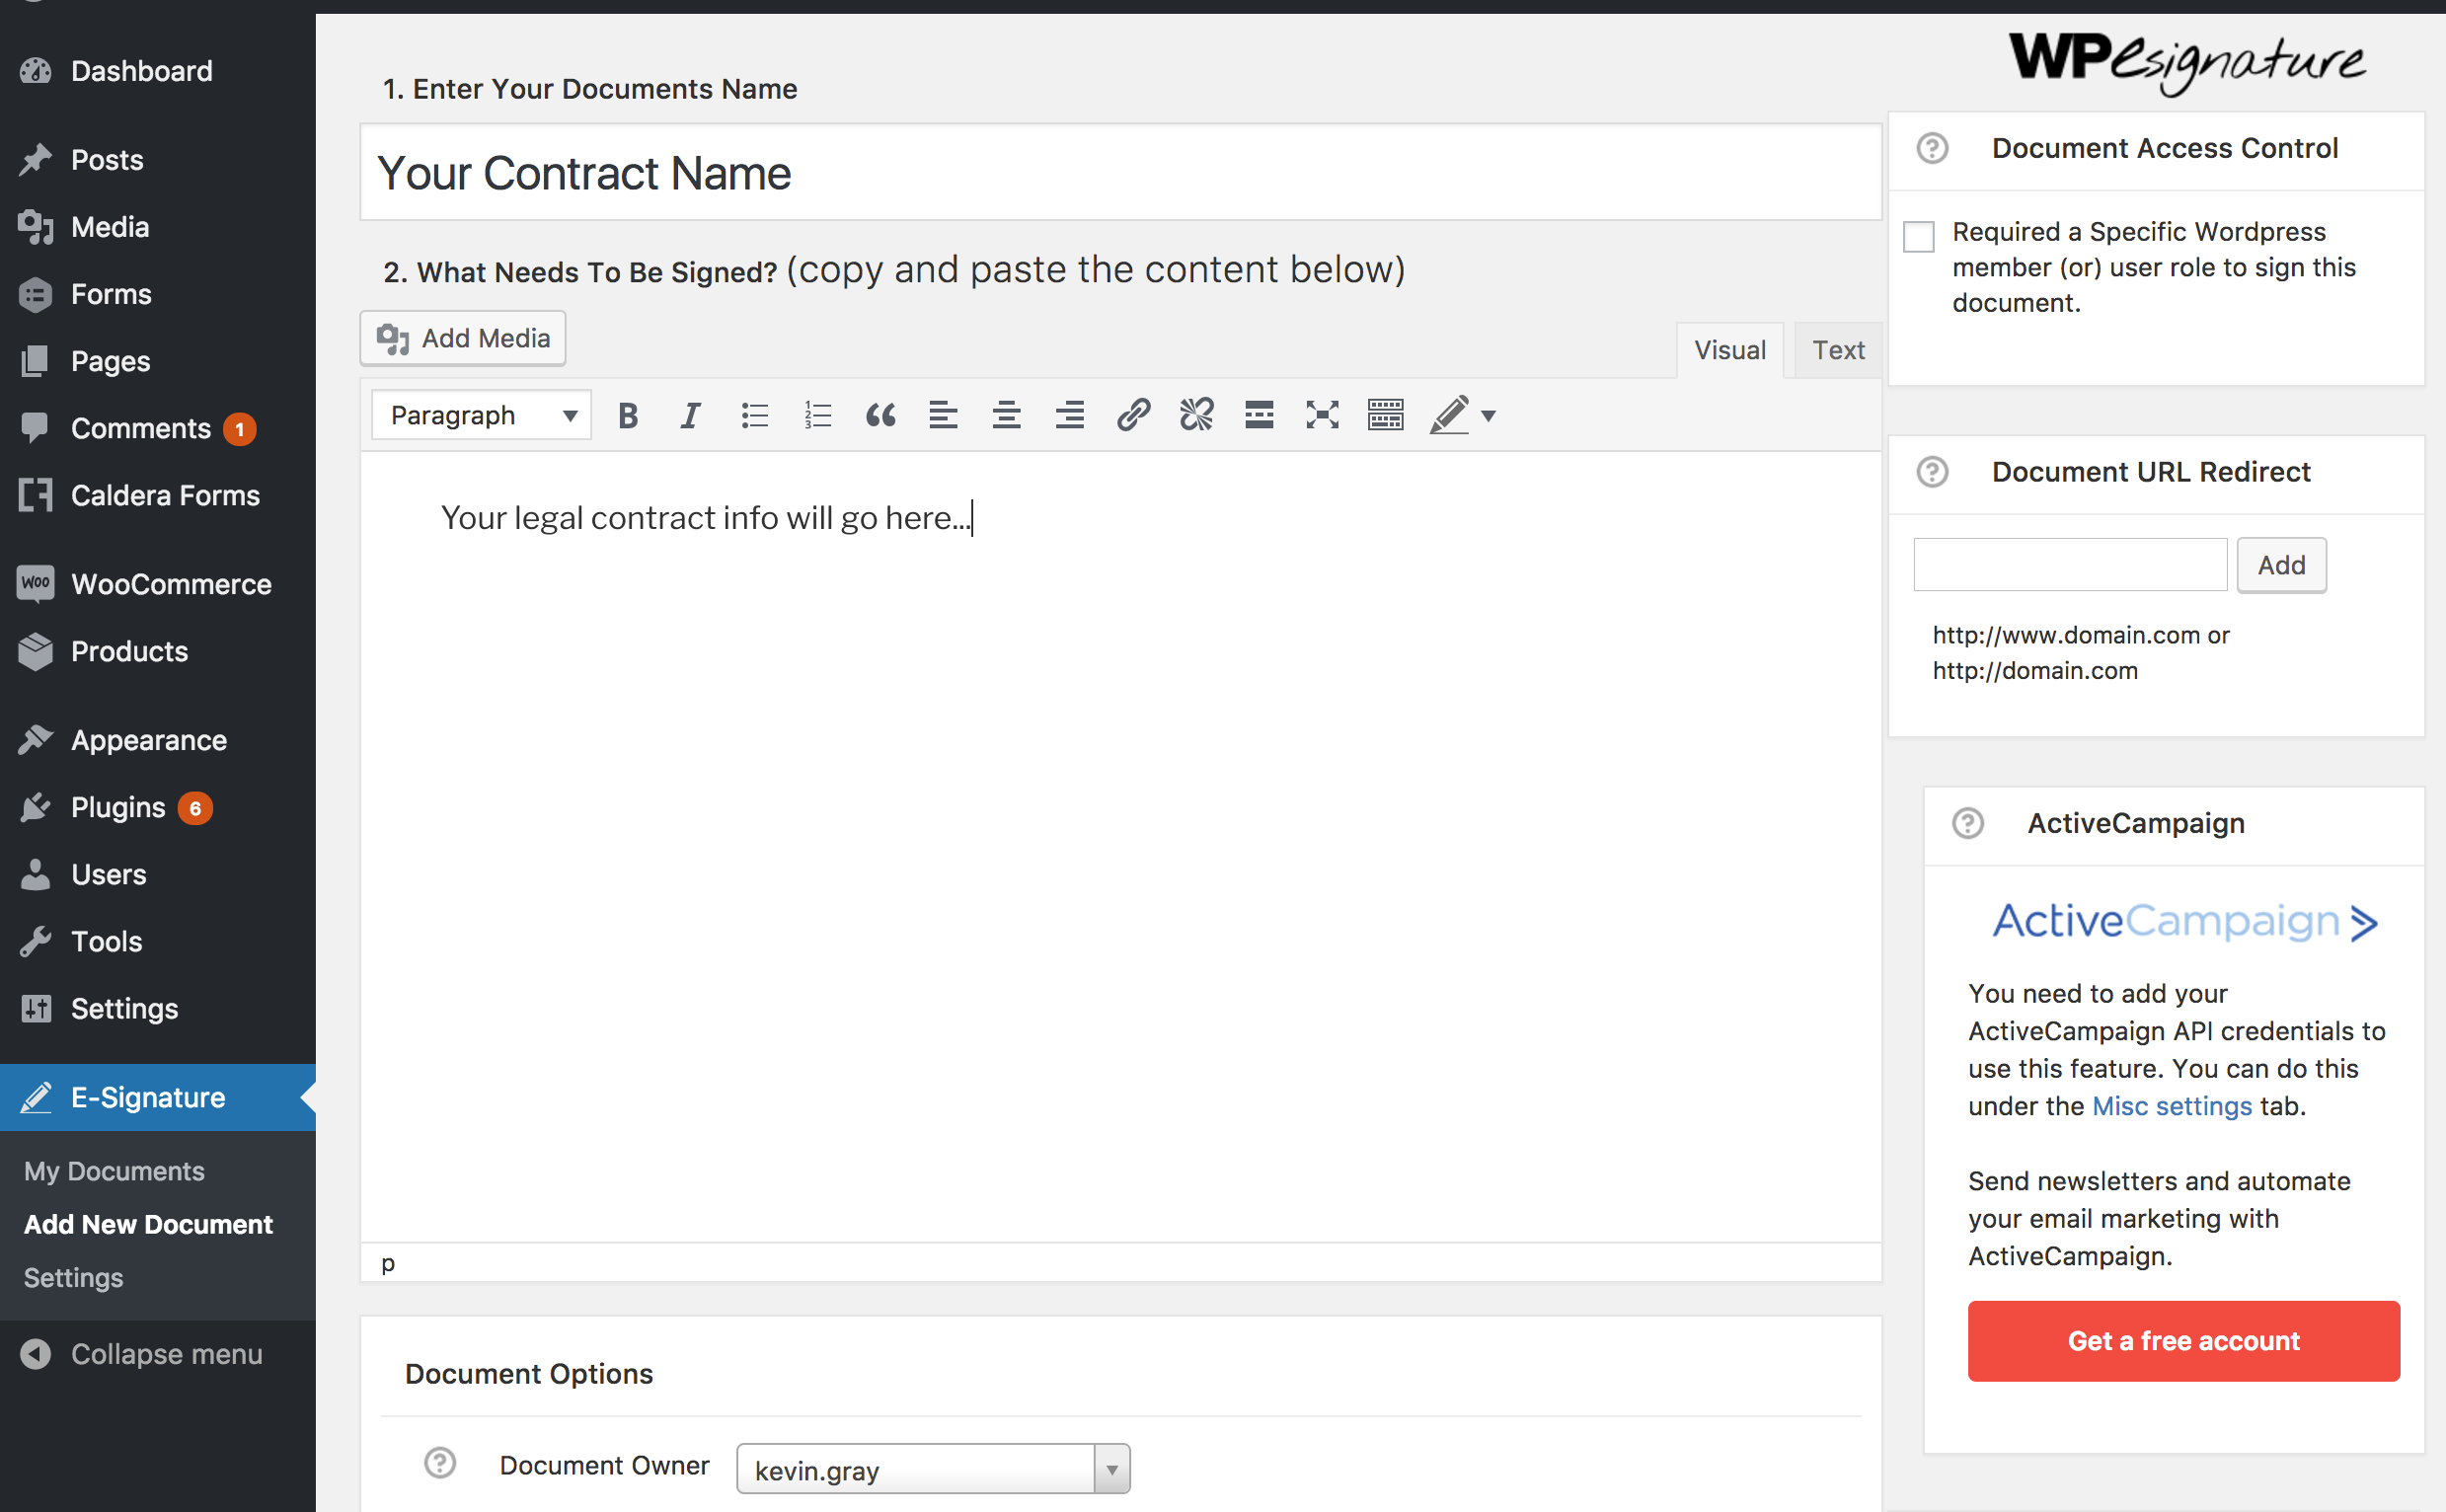
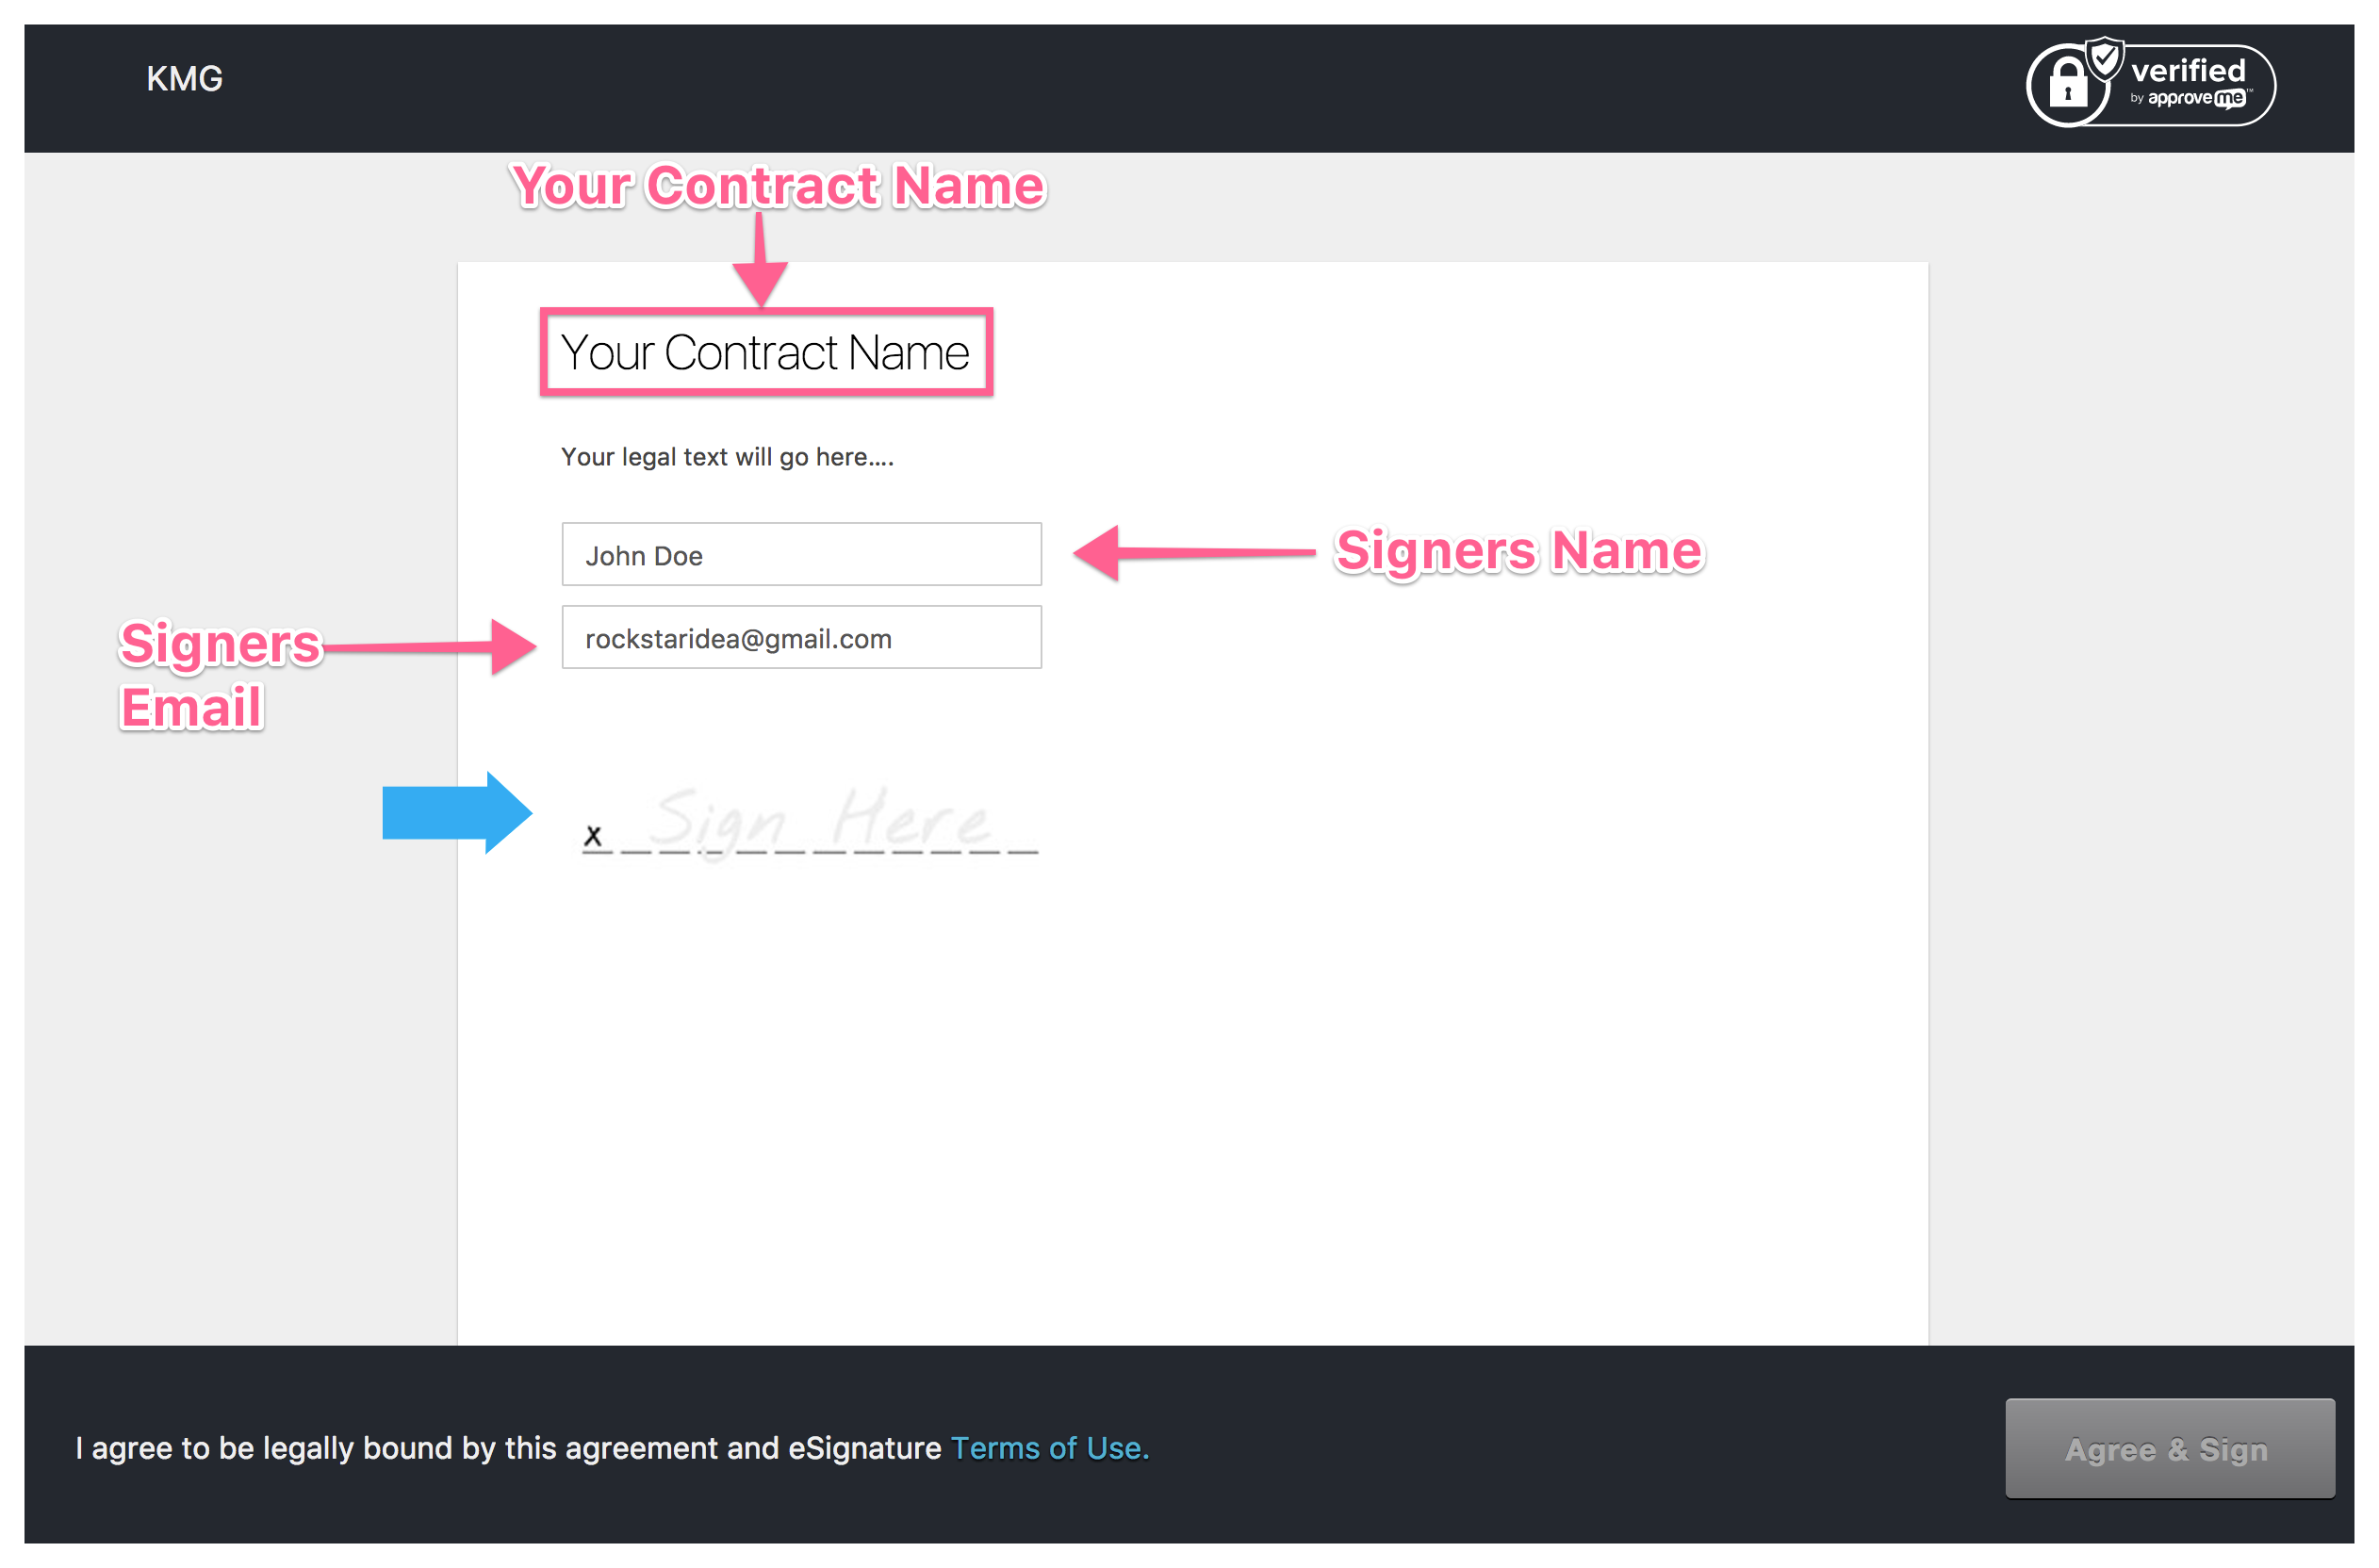
1. Sign a Test Document
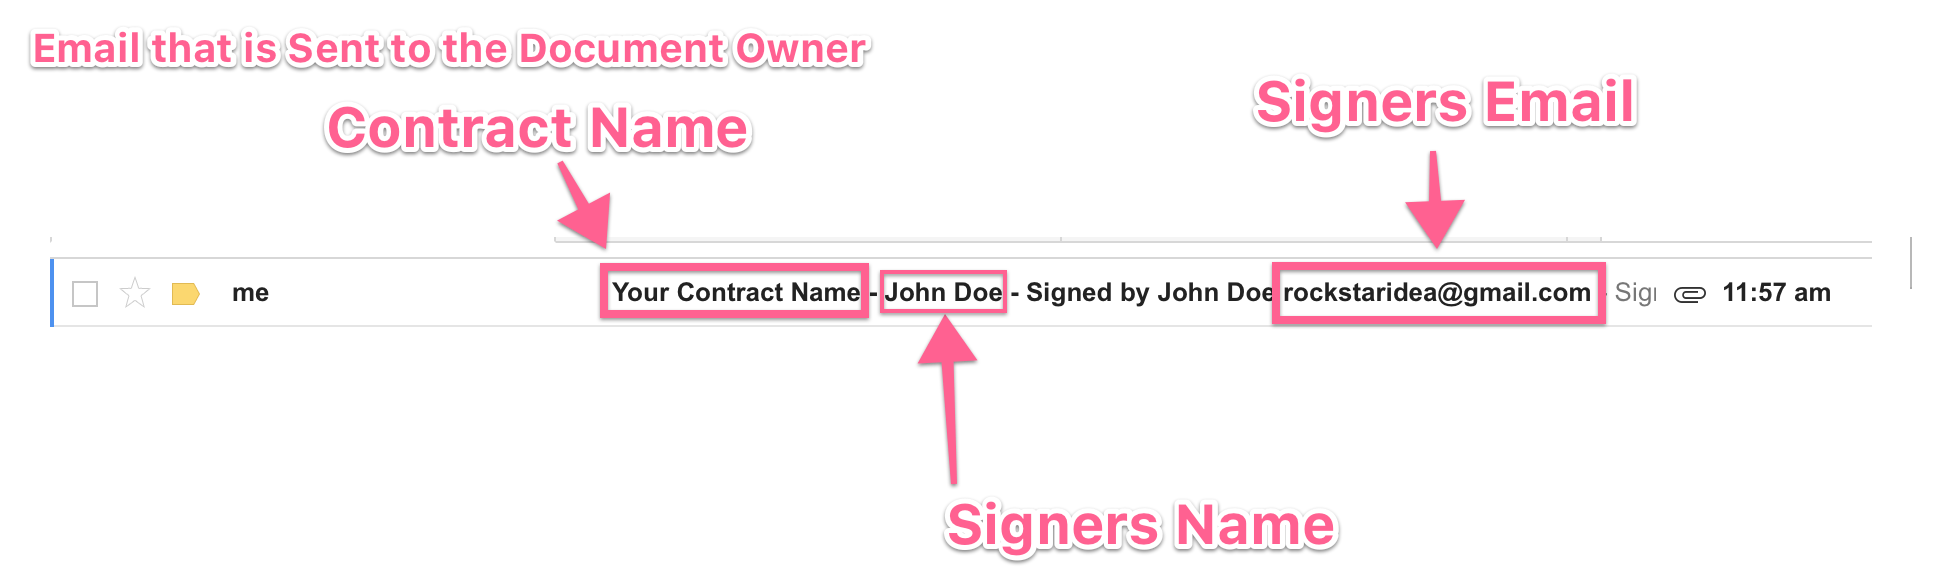
2. Login to Your Email (that is receiving these notifications)
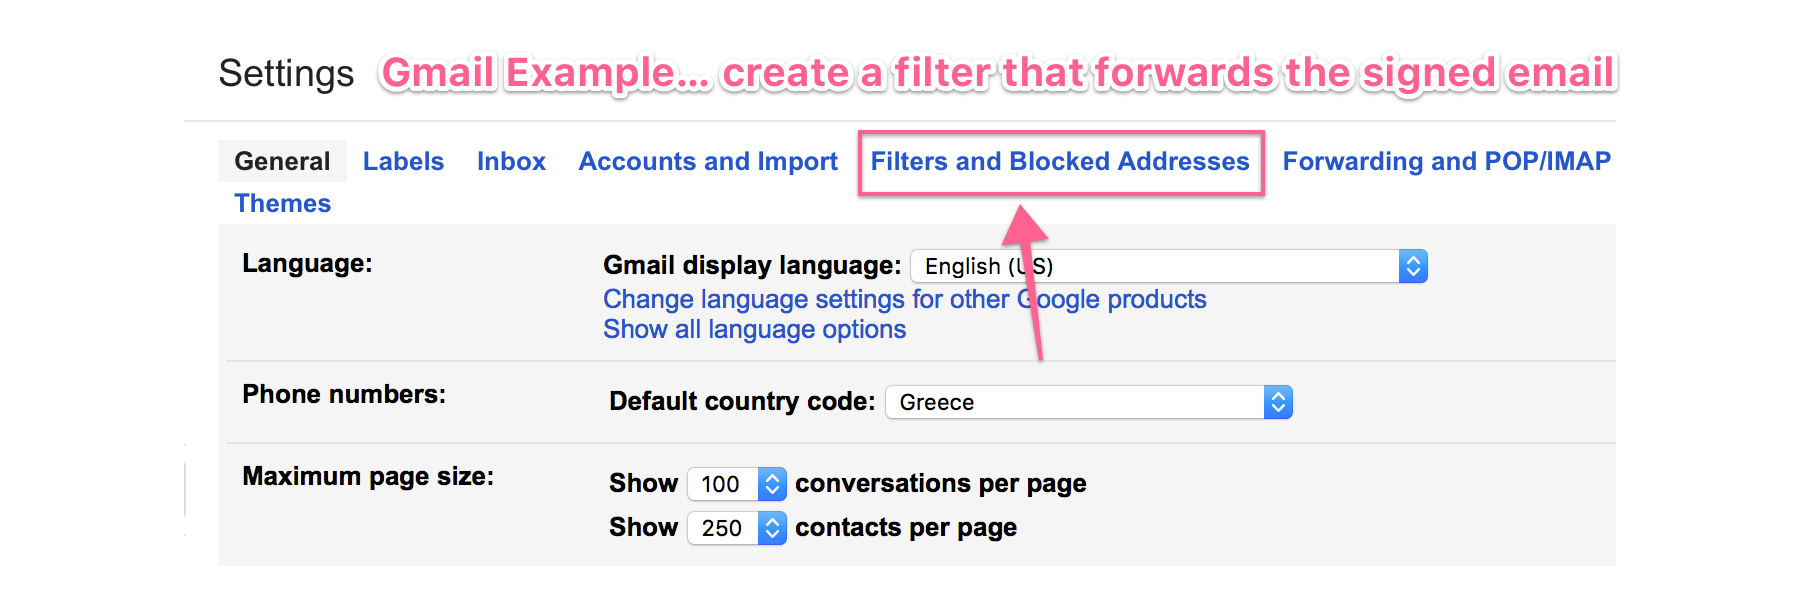
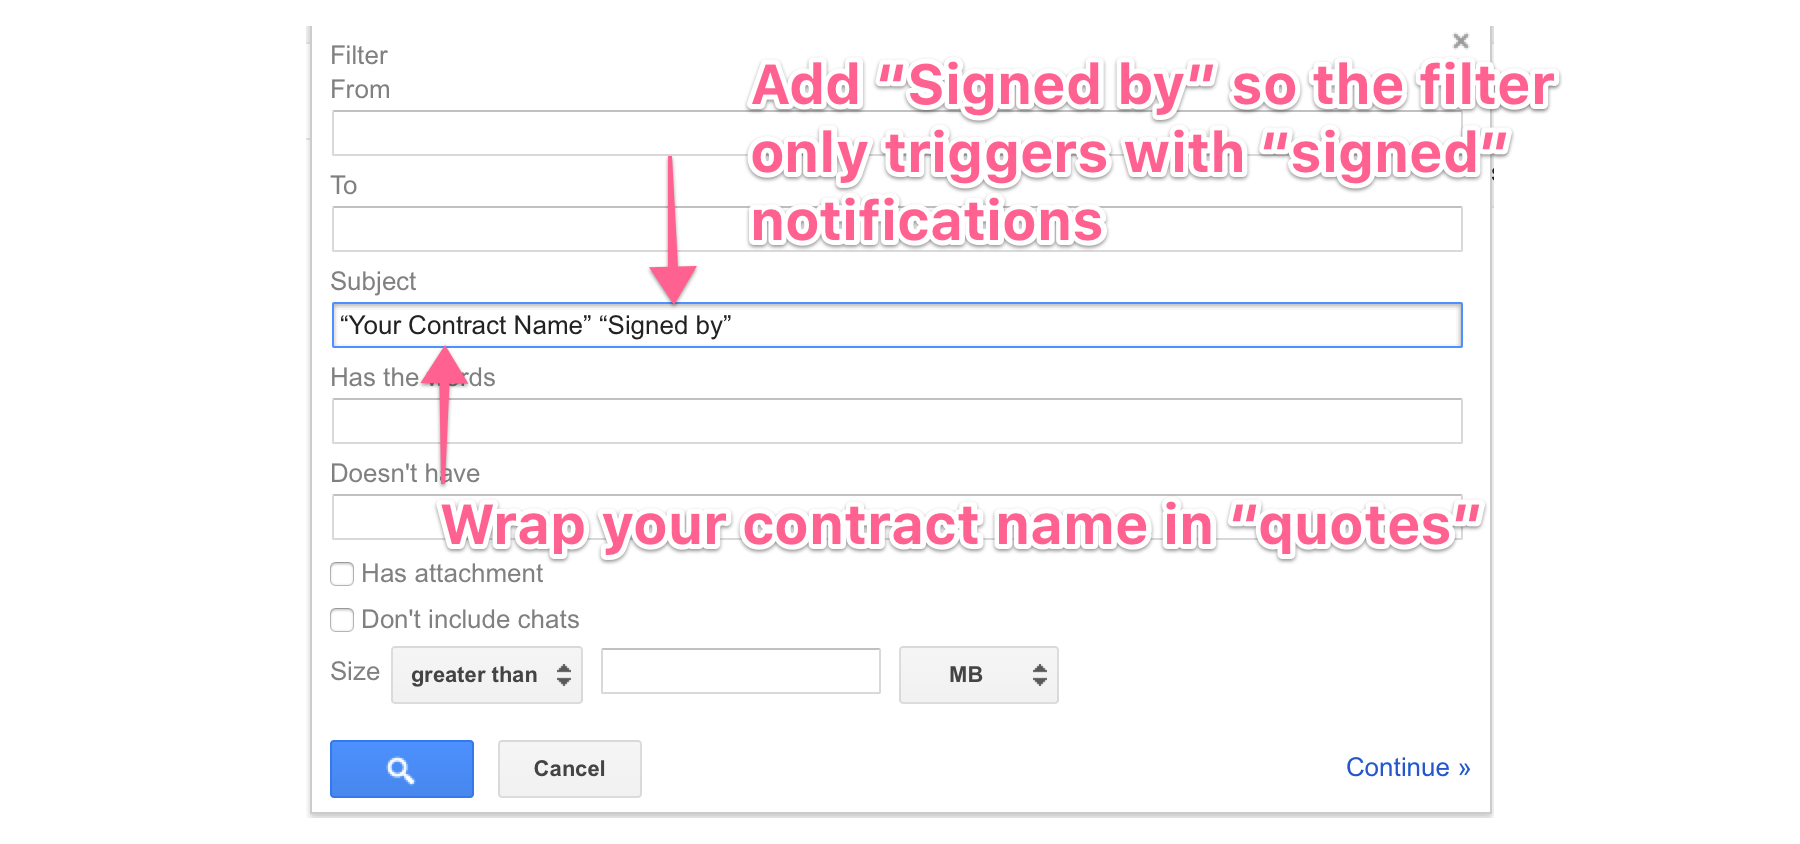
In this example we will show you how to add a filter in gmail. Just about every email provider has their own version of adding filters and it’s usually dead simple to do.

1. Sign up for a Zapier Account
To connect WP E-Signature with Zapier you will need to first sign up for a free (or paid) account at Zapier.com
2.a Get a Zapier Parser Forwarding Email
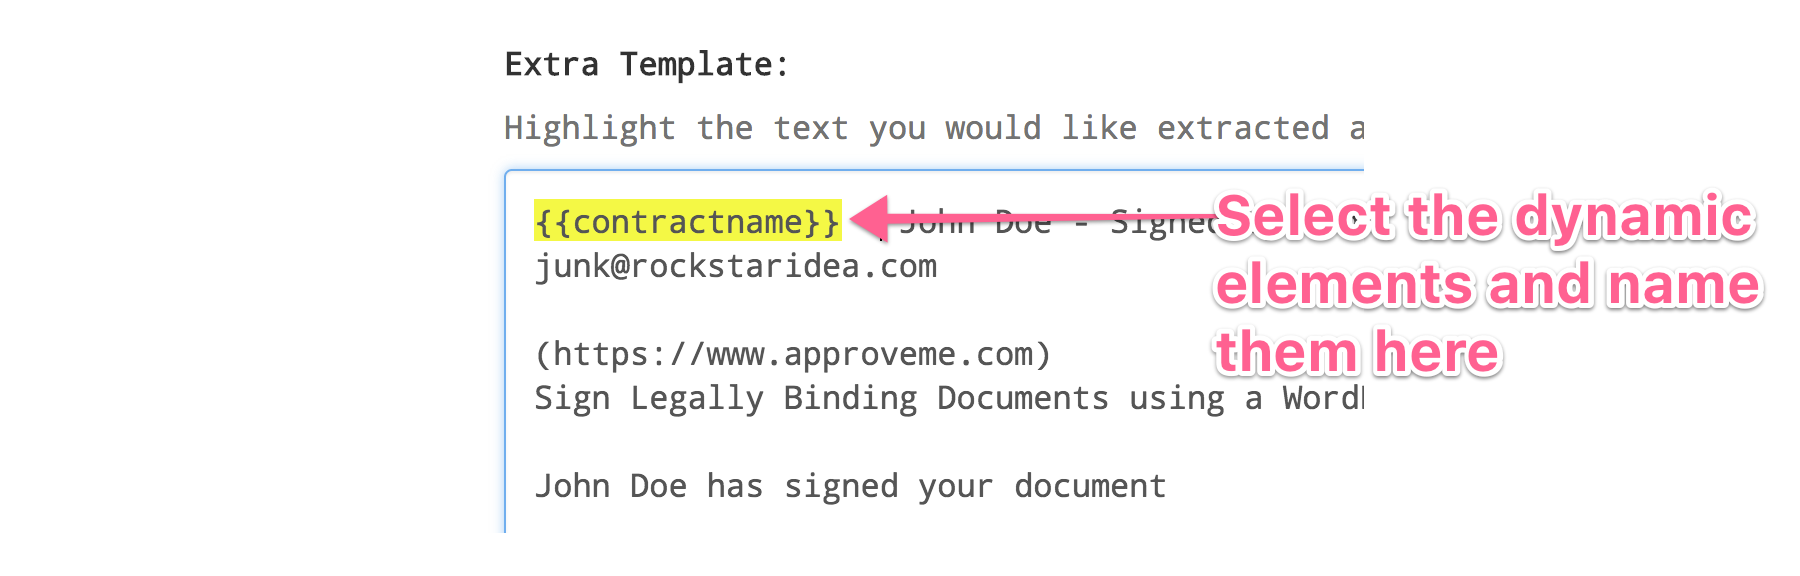
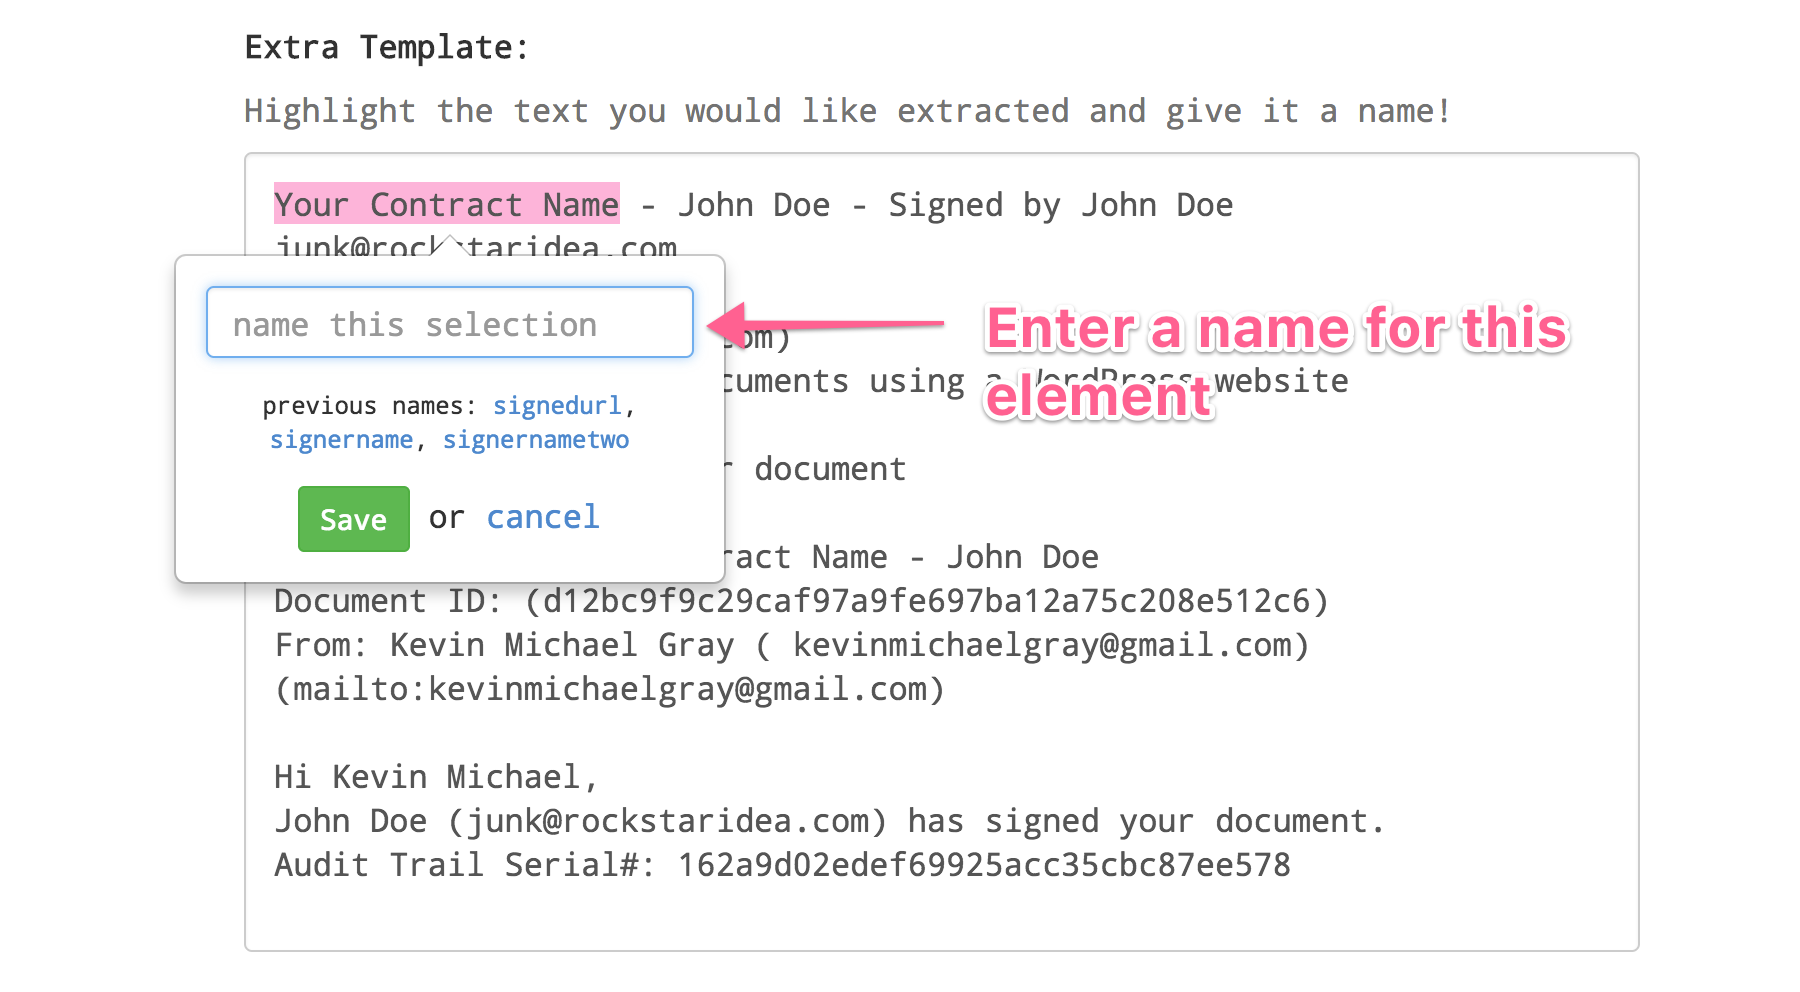
Zapier has a tool that can pull Signers Name + Signed Document URL from a WP E-Signature generated email. You will need to sign up for a Zapier Parser Email Account. Sign up Here
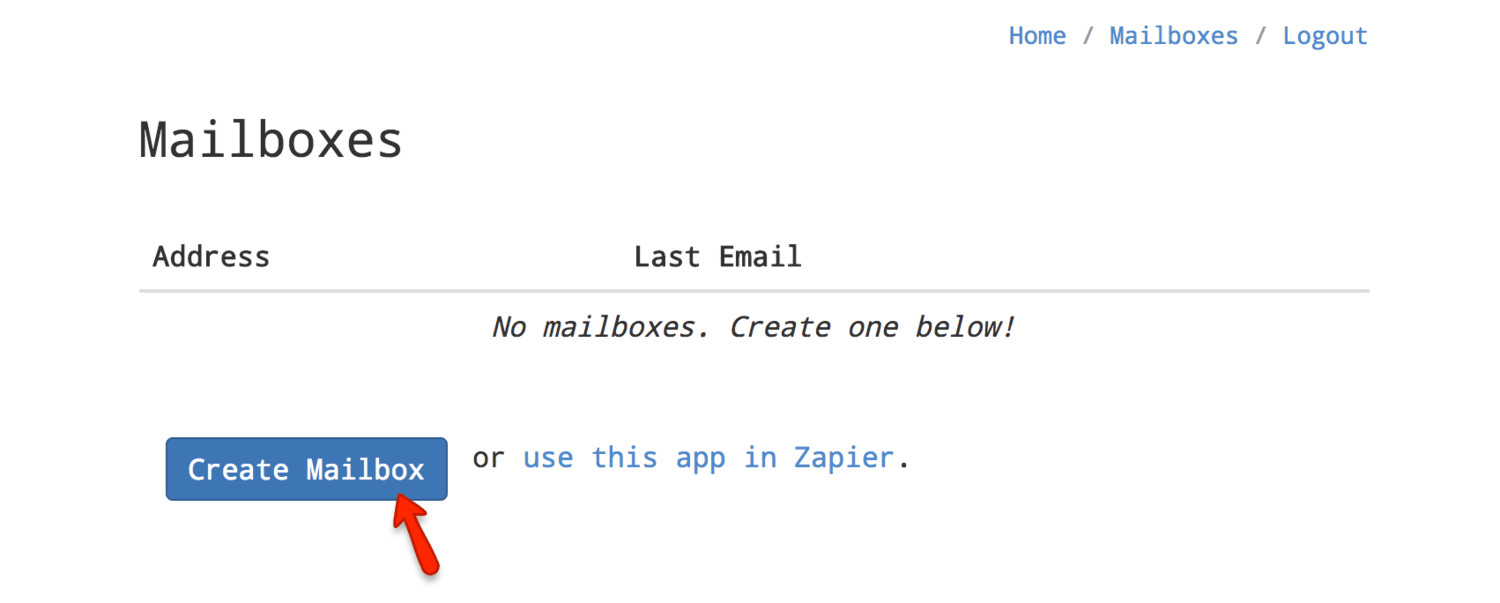
2.b Create a New Parser Mailbox
Once you’ve created a Zapier Parser Account from https://parser.zapier.com you will need to “Create a Mailbox.”

2.c Copy the Zapier Robot Parser Email Address
2.d Test the filter/email forwarding
Go sign a test document so that the signer confirmation email will be forwarded to the zapier parser robot email address.

2.e Save Settings

2.f Repeat Steps for the Document Name + Document URL

3.a Login to Zapier.com
Login and choose “Email Parser by Zapier” as the trigger
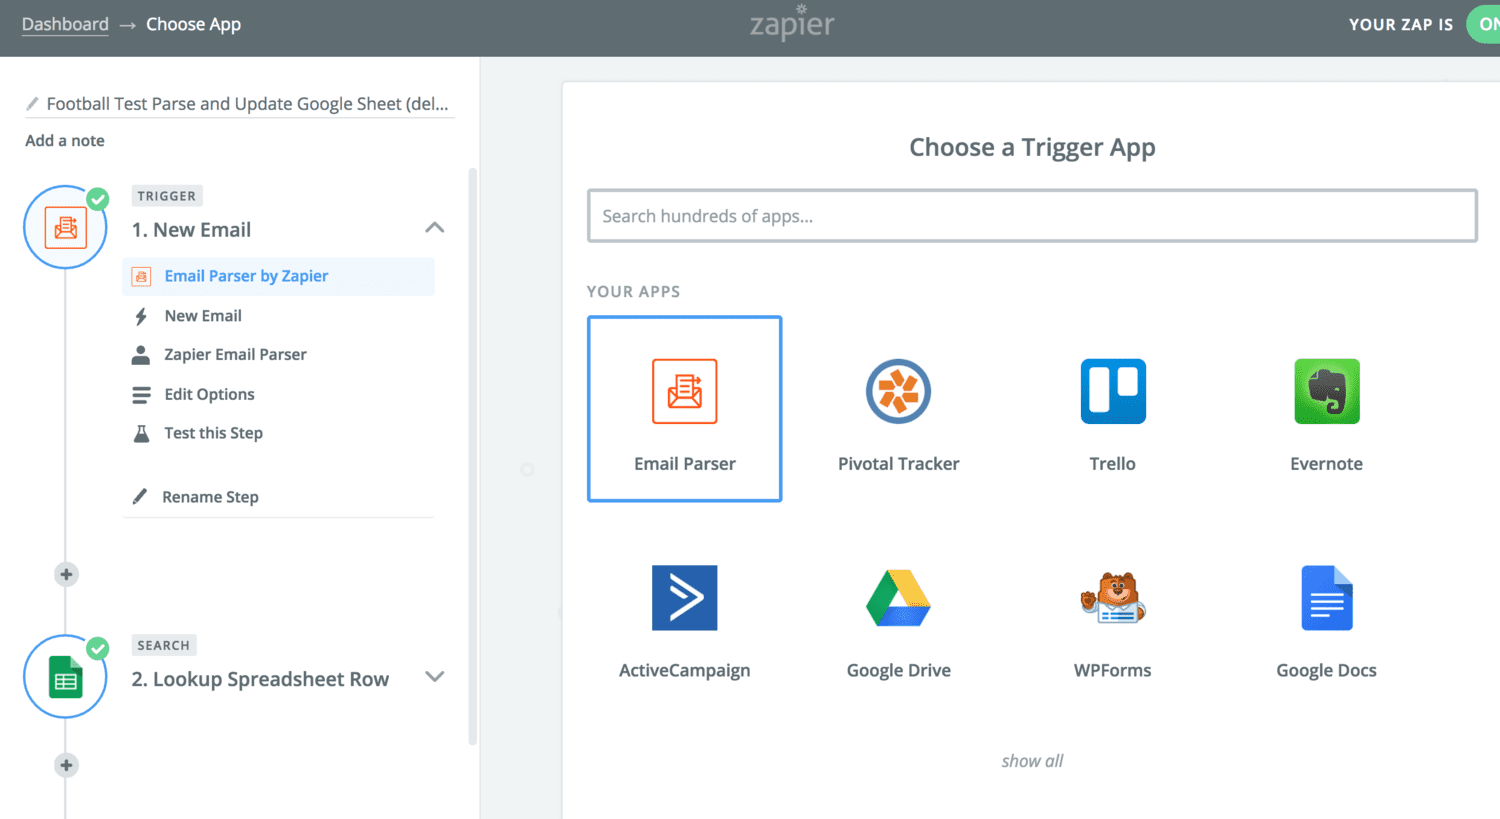
3.b Select New Email

4. Select Your “Action” in Zapier
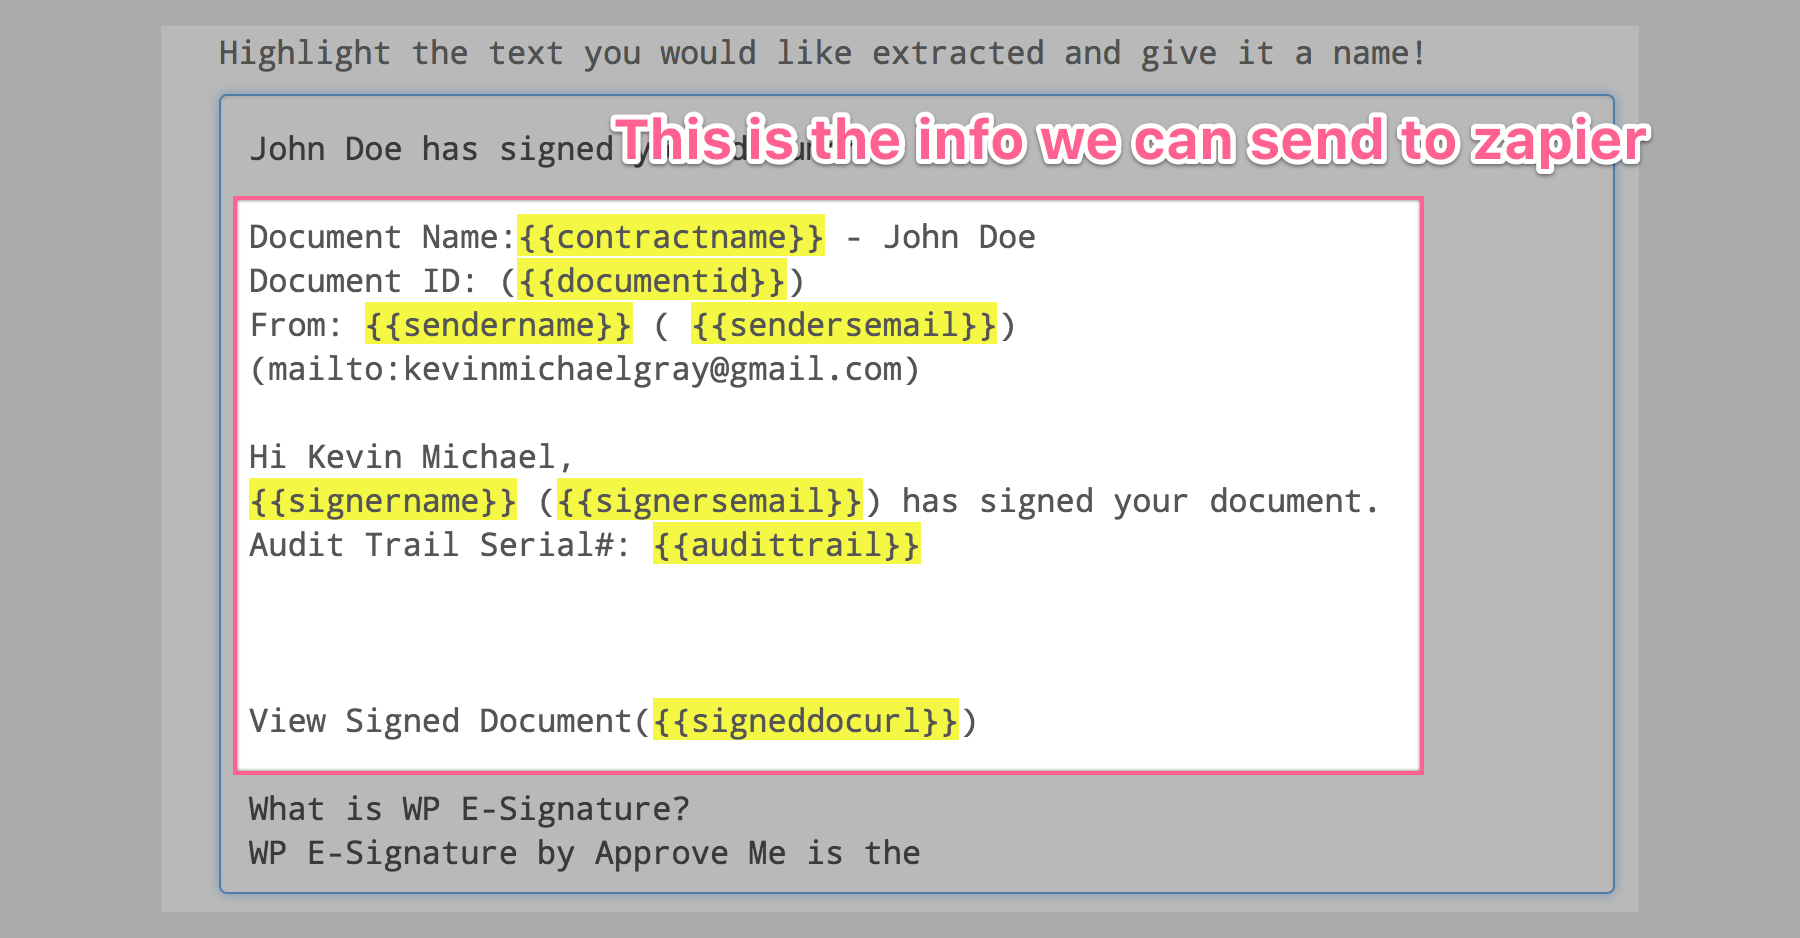
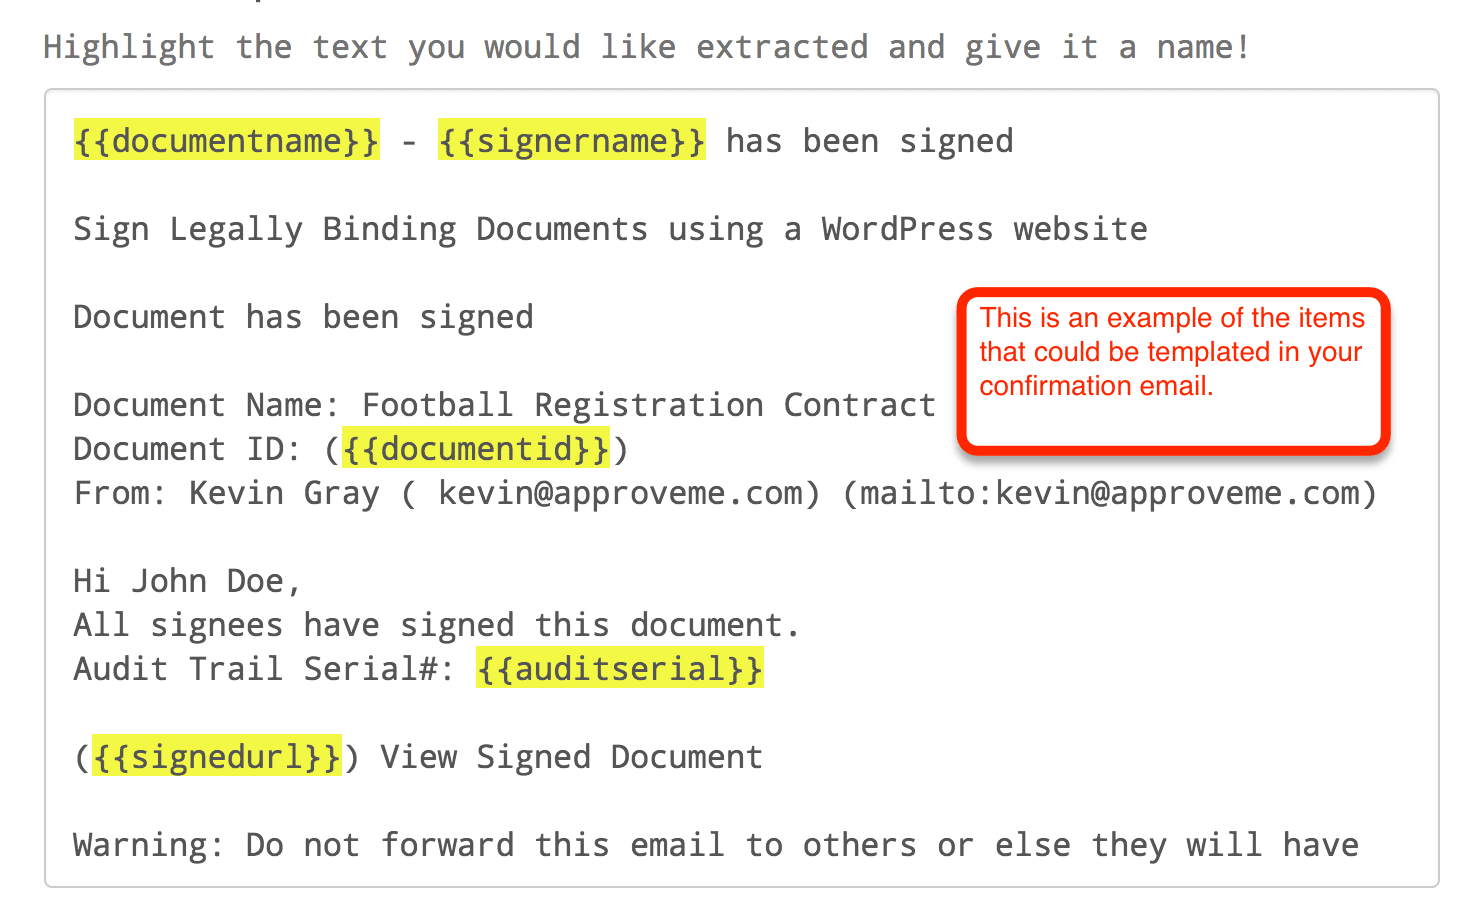
Now you have the following dynamic data to insert into any third party application that integrates with Zapier.
– Document Name
– Signer Name
– Document ID
– Signed Document URL
– Email/PDF Attachment (if there was one)
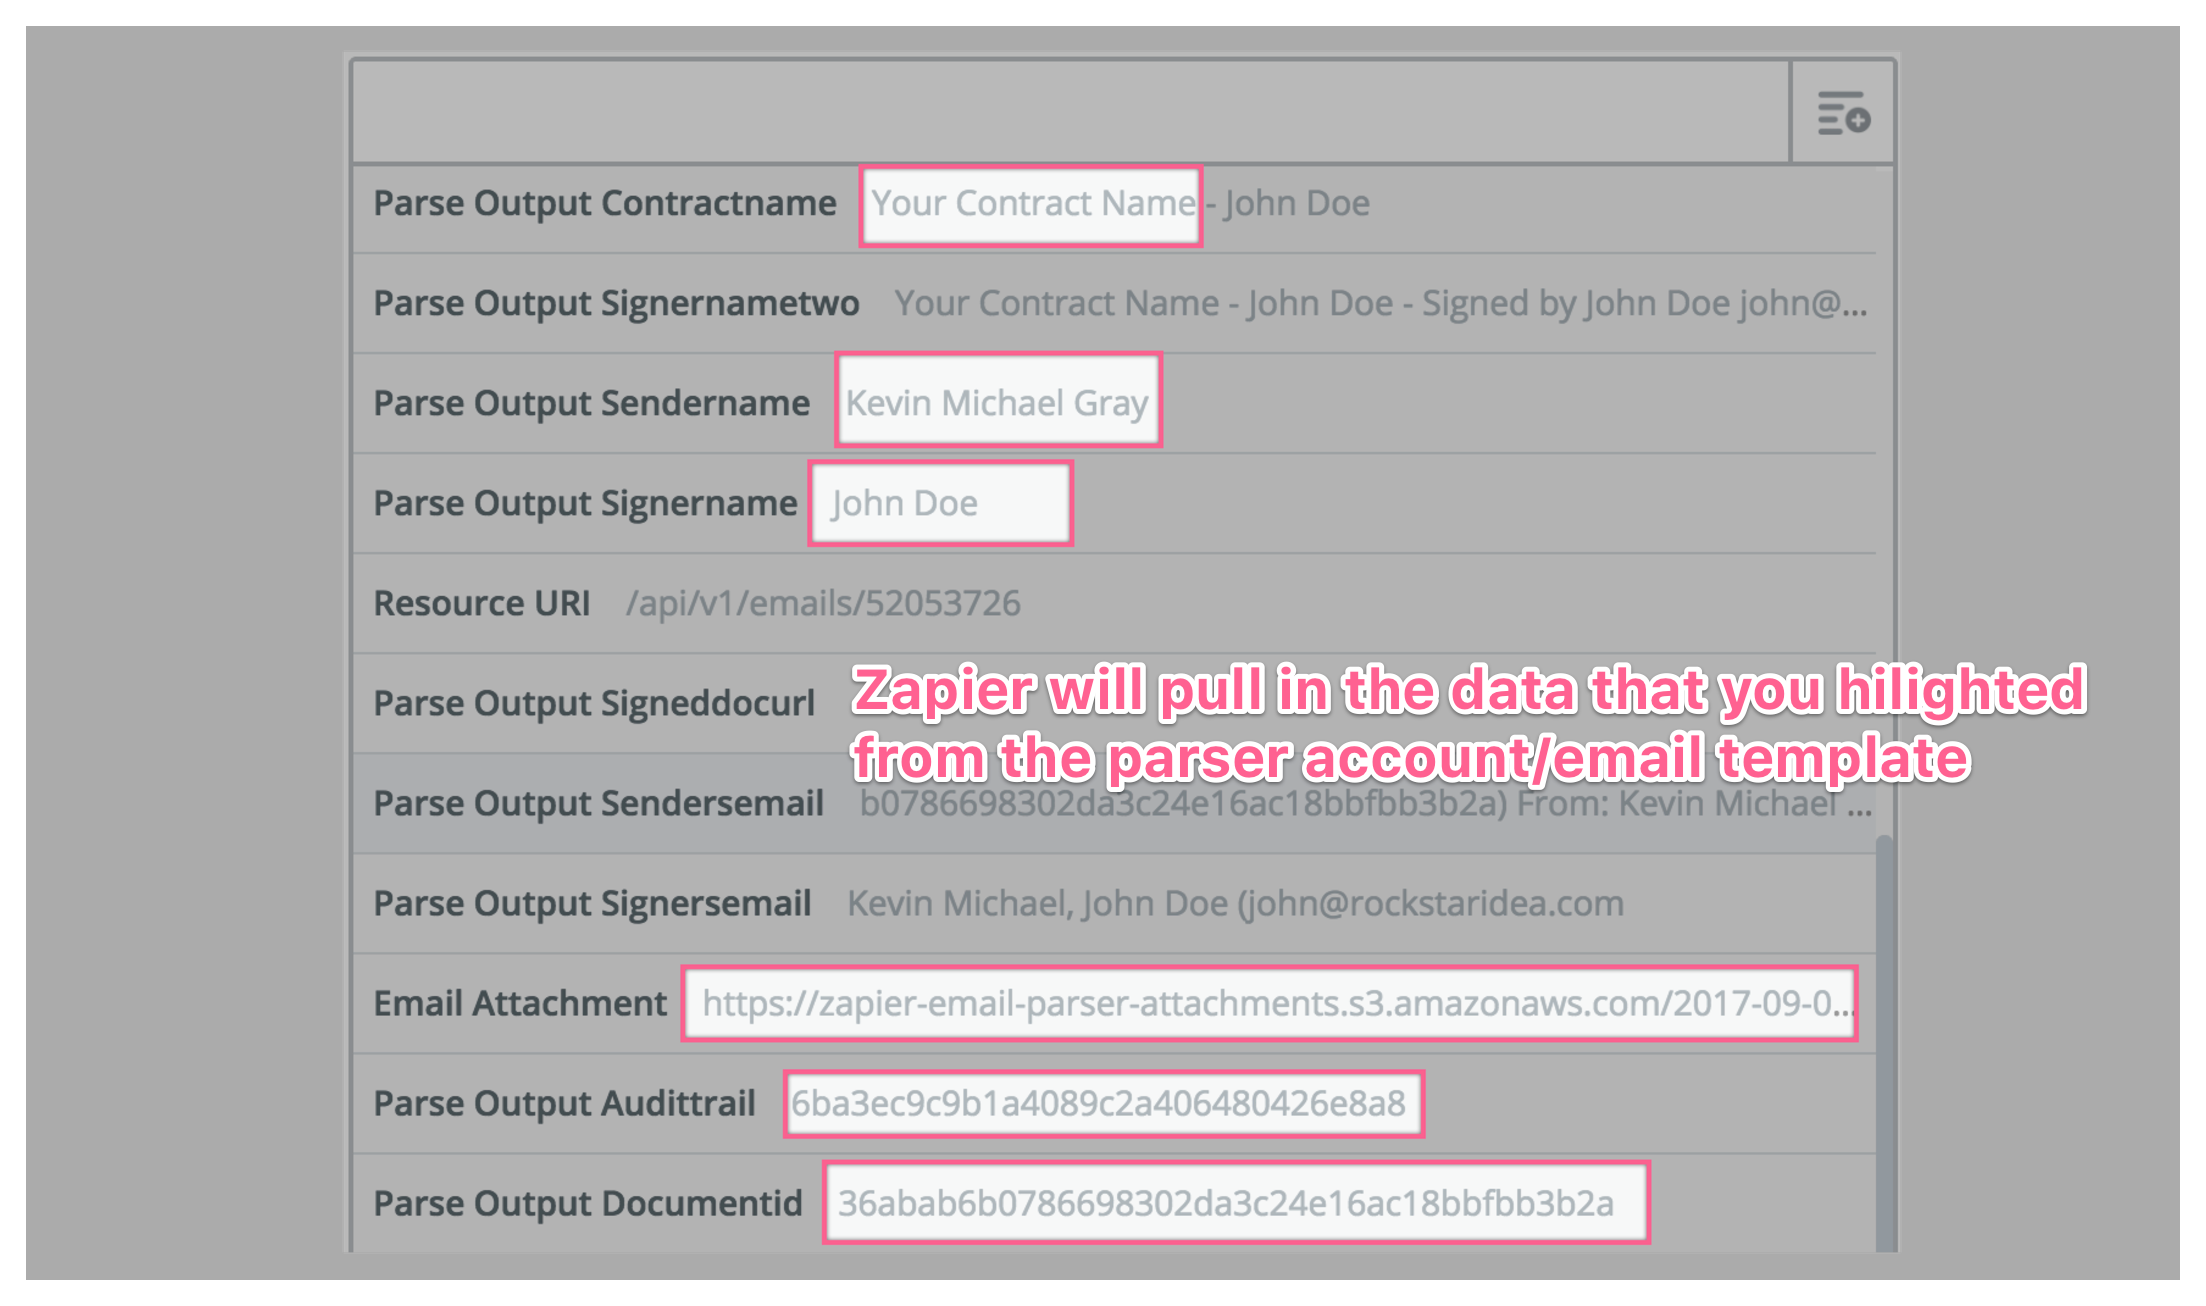
If your signed document has an attachment (i.e. the PDF signed agreement) you could easily send the PDF of the signed document to other zapier integrations + now you have the signers name, signers email, senders name, senders email, signed document URL (must be logged in to WordPress to access it), document id, audit trail id, contract name, etc.
If you have any questions about how this integration works feel free to reach-out to us at: curious at approveme.com we’re real people and we’d love to hear from you!